
1.5 million children perished in the Holocaust, Jews, Jehovah Witnesses, Gypsies and the disabled were labeled as degenerate and exteminated. These children kept walking in these shoes, enduring unimaginable hardship, right up until the day they were murdered. If they had a chance to grow up, what might they have done with their lives? Each of my students was assigned the identity of a child who experienced the Holocaust and created a sculpture of a shoe to honor them. They explored the hopes and dreams of children who would never be able to realize those dreams for themselves.
 |
| Memorial art instillation to the children who perished in the Holocaust, created by my middle school students. |
 |
| Shoe sculptures by 6th, 7th and 8th grade students, Samuel E. Shull School |
To see more photographs of the belongings of Holocaust victims please visit the website of the Auschwitz museum by clicking here and here.
SOLE WITNESS, AN ART INSTILLATION BY THE STUDENTS OF SAMUEL E. SHULL SCHOOL, AND ANY OTHER STUDENTS FROM AROUND THE WORLD WHO WOULD LIKE TO PARTICIPATE.
1.5 million children died in the Holocaust. Together, can we create enough sculptures of shoes to memorialize all of them? Some of these children were very young at the time of their deaths. What would they have been able to accomplish if they had a chance to grow up? Can we imagine futures for all of them, free from war?
If you would like to participate, watch the video above and create your own art instillation with your own students. Then photograph their work and send the pictures to thehelpfulartteacher@gmail.com
If your students created artist statements to go with their work, please share them here too. Let me know how many children you memorialized and how you publicized your students work. If you blog about it, I will add the link to the bottom of this post.
SOLE WITNESS, AN ART INSTILLATION BY THE STUDENTS OF SAMUEL E. SHULL SCHOOL, AND ANY OTHER STUDENTS FROM AROUND THE WORLD WHO WOULD LIKE TO PARTICIPATE.
If you would like to participate, watch the video above and create your own art instillation with your own students. Then photograph their work and send the pictures to thehelpfulartteacher@gmail.com
If your students created artist statements to go with their work, please share them here too. Let me know how many children you memorialized and how you publicized your students work. If you blog about it, I will add the link to the bottom of this post.
I showed my students some photographs of these horrifying piles of shoes and told them about how the victims were transported in filthy cattle cars to what they thought were relocation camps. Once they got to their final destination, everyone's head was shaved (supposedly as a precaution against lice). They were directed to remove their clothing and shoes so that they could be showered off, deloused and disinfected. Once they entered the shower house the door was locked. Instead of water, poisonous gas came out of the shower heads. The bodies of victims were then cremated in giant ovens. The victims' hair was used to stuff mattresses and pillows, the discarded clothing could be salvaged for rags but the broken worn out shoes of the victims continued to pile up. When the allied forces liberated extermination camps throughout Europe at the end of the war these towering masses of footwear were one of the first things they saw. In many cases these anonymous broken shoes were all that was left of the millions of victims of Hitler's 'final solution'. Every single one of those shoes had a story to tell. The people who wore them had ideas, hopes, dreams and ambitions that were all taken away.
Those shoes were worn by people who suffered persecution and starvation but still kept walking right up to the very end of their lives. If those shoes could talk, what would they tell us?
Those shoes were worn by people who suffered persecution and starvation but still kept walking right up to the very end of their lives. If those shoes could talk, what would they tell us?
In contrast to these brown piles of anonymous shoes, I showed my classes the sculptures of several contemporary artists. Here are some shoe sculptures by Robert Tabor:

In a New York Minute by Robert Tabor

"Little Red Fire Island Wagon" by Robert Tabor
To see more of Tabor's shoe sculptures, click here. He calls his work 'Sole Sensations'. Unlike the ragged discarded shoes of the Holocaust, each one of Tabor's creations is hand crafted to express an idea or tell a unique story.
The sculpture below, "Gold Digger" by Sebastian Errazuriz is part of his series, "12 shoes for 12 lovers". What do you think he was trying to say about the ex girlfriend who inspired this shoe? Why do you think he designed the heel that way?


Here are some examples of Willie Cole's artwork:


To see more contemporary shoe art and learn about these and other artists, browse through the images at the "Virtual Shoe Museum" by clicking here.
George Segal was a very famous artist who created sculptures using plaster bandages, in much the same way you will create your shoes. He made very detailed plaster casts and was best known for his expressive people. His work often addressed important social issues. Below is the Holocaust Memorial sculpture in San Francisco that he created using the same materials you are using in class. This art instillation shows a survivor and victims.
You will be assigned either a survivor or victim and asked to put yourself 'in their shoes'.
To learn more about the artist George Segal, click here.


You will only be able to see the full alphabetical list if you use a desktop computer or 'request desktop site' from a mobile device. Since my students would be using their own old shoes to create their sculptures I separated the piles of identities by gender, however I also honored student requests if they wanted to memorialize a victim or survivor of another sex.
We discussed how the Holocaust involved the extermination of many different types of people. You can read about the persecution of non-Jewish victims by clicking here.
The assignment was to imagine an adulthood free from war for the youngest victims and survivors of the Holocaust. 1.5 Million Children died in the Holocaust. Gypsies, Jews, Jehovah Witnesses, Polish Children, disabled children, children with epilepsy, children with autism. What might they have done with their lives had they had a chance to grow up? What diseases might they have cured? What novels might they have written? What paintings would they have painted? What inventions would they have envisioned? Let us pull their shoes out from the pile of anonymity and use our imagination to explore that question through our artwork.
The assignment was to imagine an adulthood free from war for the youngest victims and survivors of the Holocaust. 1.5 Million Children died in the Holocaust. Gypsies, Jews, Jehovah Witnesses, Polish Children, disabled children, children with epilepsy, children with autism. What might they have done with their lives had they had a chance to grow up? What diseases might they have cured? What novels might they have written? What paintings would they have painted? What inventions would they have envisioned? Let us pull their shoes out from the pile of anonymity and use our imagination to explore that question through our artwork.
There are as many different techniques for creating shoe sculptures as there are artists creating them. I introduced my students to several different techniques. Here is a simple, non-messy technique that you can use in your own classroom.

Step 1: Trace the soles of the shoes onto cardboard


Step 2: Cut the shapes out

Step 3: Trace the side of the shoe onto tag board or poster board leaving extra room at the bottom and at the heel

Step 4: Create a fringe along the bottom of the shoe

Step 5: Cut the shoe silhouette out and bend the fringe in

Step 6: Before attaching the side of the shoe to the sole, trace an exact copy of it onto another piece of Oaktag and cut that out the same way.

Step 7: Begin attaching the sides to the sole using flat pieces of tape. Match the two halves at the toe of the sole.


If necessary, cut an extra strip of Oaktag and attach it to complete the heel

Step 8: For the tops of the shoes and the tongue, trace the sole of the shoe again, this time onto Oaktag

Tape to the top but stop half way up


Cut the top of the shoe like this. Save the top half for the tongue

Tape the tongue underneath using a flat piece of tape

Here is the assembled paper shoe. My students were required to complete their shoes with Plaster Craft bandages. In order to do this, without the sculpture collapsing, the form will need to be completely covered with tin foil.
Here is a short video tutorial outlining the shoe assembly process shown above:
The easiest way to create a shoe sculpture, using plaster bandages, is to cover your foot with saran wrap and simply mold the wet bandages around your foot. You can also make a cast of an old shoe after first covering it with saran wrap. Watch the video below to see how:
Many of my students found that they needed to cut the plaster bandages at the heel in order to slide their foot or shoe out of the mold. They then became frustrated that their sculpture was broken. Here is a quick tutorial on how to repair the heel of the shoe by using tin foil and then applying another layer of plaster craft over it to make it good as new!
MANY APPROACHES, MANY SOLUTIONS
The video below shows the variety of ways my students used to construct a three-dimensional plaster shoe. In art, as in life, there is no single correct way to solve a problem. This project promotes 'design thinking' and
'creative problem solving'.
Adding detail to your sculpture
Sculptural details may be added with clay and then covered with Plaster Craft. As you can see from the video below, much of the detail will be lost when you cover the clay with with plaster bandages. This can be remedied by wetting small pieces of plaster bandage, mushing them up, sculpting them into the shape you want and then smoothing them into the wet plaster.
You can also use a pencil or the point of a scissors to sculpt back in any details you have lost in the process.
Please remember that you will eventually be painting your shoe and will thus have the opportunity to add the details back in later using line and color.
I added a hand holding a camera to my shoe, with the camera strap doubling as a shoe lace. My father, a Holocaust survivor, has always loved tinkering with machines, especially mechanical cameras. He loves to take photographs and brought his camera everywhere he went throughout most of his life. In all my childhood memories he his holding a camera. My shoe represents him, his individuality and his unique personality. It is my way of saying that he is not a label, a number or a member of a group that Hitler despised. He is an individual, with hopes and dreams.
ADDING A HIGH HEEL
Some of my students decided to design ladies shoes and needed to add a high heel after casting their foot. Here is how they did it:
 |
| High heeled shoe designed by student. First she made a plaster cast of her foot. Then she added the heel, using tinfoil. Finally she coated the tinfoil in Plaster Craft. |
My students, in grades 6-8, are required to create artist statements to go with their sculptures. As they are working they use the worksheet below to help them to take notes in preparation for their writing:
Here are my specific guidelines for developing an artist statement for this shoe project:
My students will get one full project grade for their sculpture and another full project grade for their written artist statement, connecting their artwork to the victim or survivor they were assigned.
STUDENT ART GALLERY
The video below showcases some of my students' sculptures and artist statements:


 |
| "When I was creating this shoe I felt a little sad because she would never be able to see the shoe. Lisl Winternitz never got to even wear high heels because she died at such a young age. I chose the colors pink and purple because when I imagined a girl dressing up as a fairy princess I imagined her wearing those colors." |
 |
| "I put two pieces of paper with A+ on them because she was a great and smart student. I included a dance costume because she loved to dance. The story that I invented was that her brother and her are dance partners. The are so talented that they win first place at every competition. Paula was shot by Nazi soldiers at age 14. I felt sad that she never got to live the happy life she deserved to have." |
 |
| "He worked in a metal shop so I imagined he might have become a car designer." |
 |
| "This shoe represents Nadine Schatz, a girl who could have become a famous artist, loved being creative and colorful and loved animals. It is made of hearts, galaxies, art utensils and a cat." |
 |
| "A dog is her spirit animal" |
 |
| "Peter Ginz might have become a famous journalist because he was already writing books by the age of 8. He died in a concentration camp when he was 15. I want to think that I made him nice shoes that would have cost a lot. I was sad when I did the shoe. It made me cry that he wouldn't become famous and rich." |
To learn more about how Hitler persecuted artists and musicians during the Third Reich, please visit my blog post on the subject by clicking here.
To learn about the artwork of the children of Terezin Concentration Camp, please click here.
This lesson was used by 5th grade Language Arts teacher Lisa Nogueira as part of a project based learning unit, after her class read the book Hana's Suitcase. Here are some photographs of the wonderful shoes her students made:


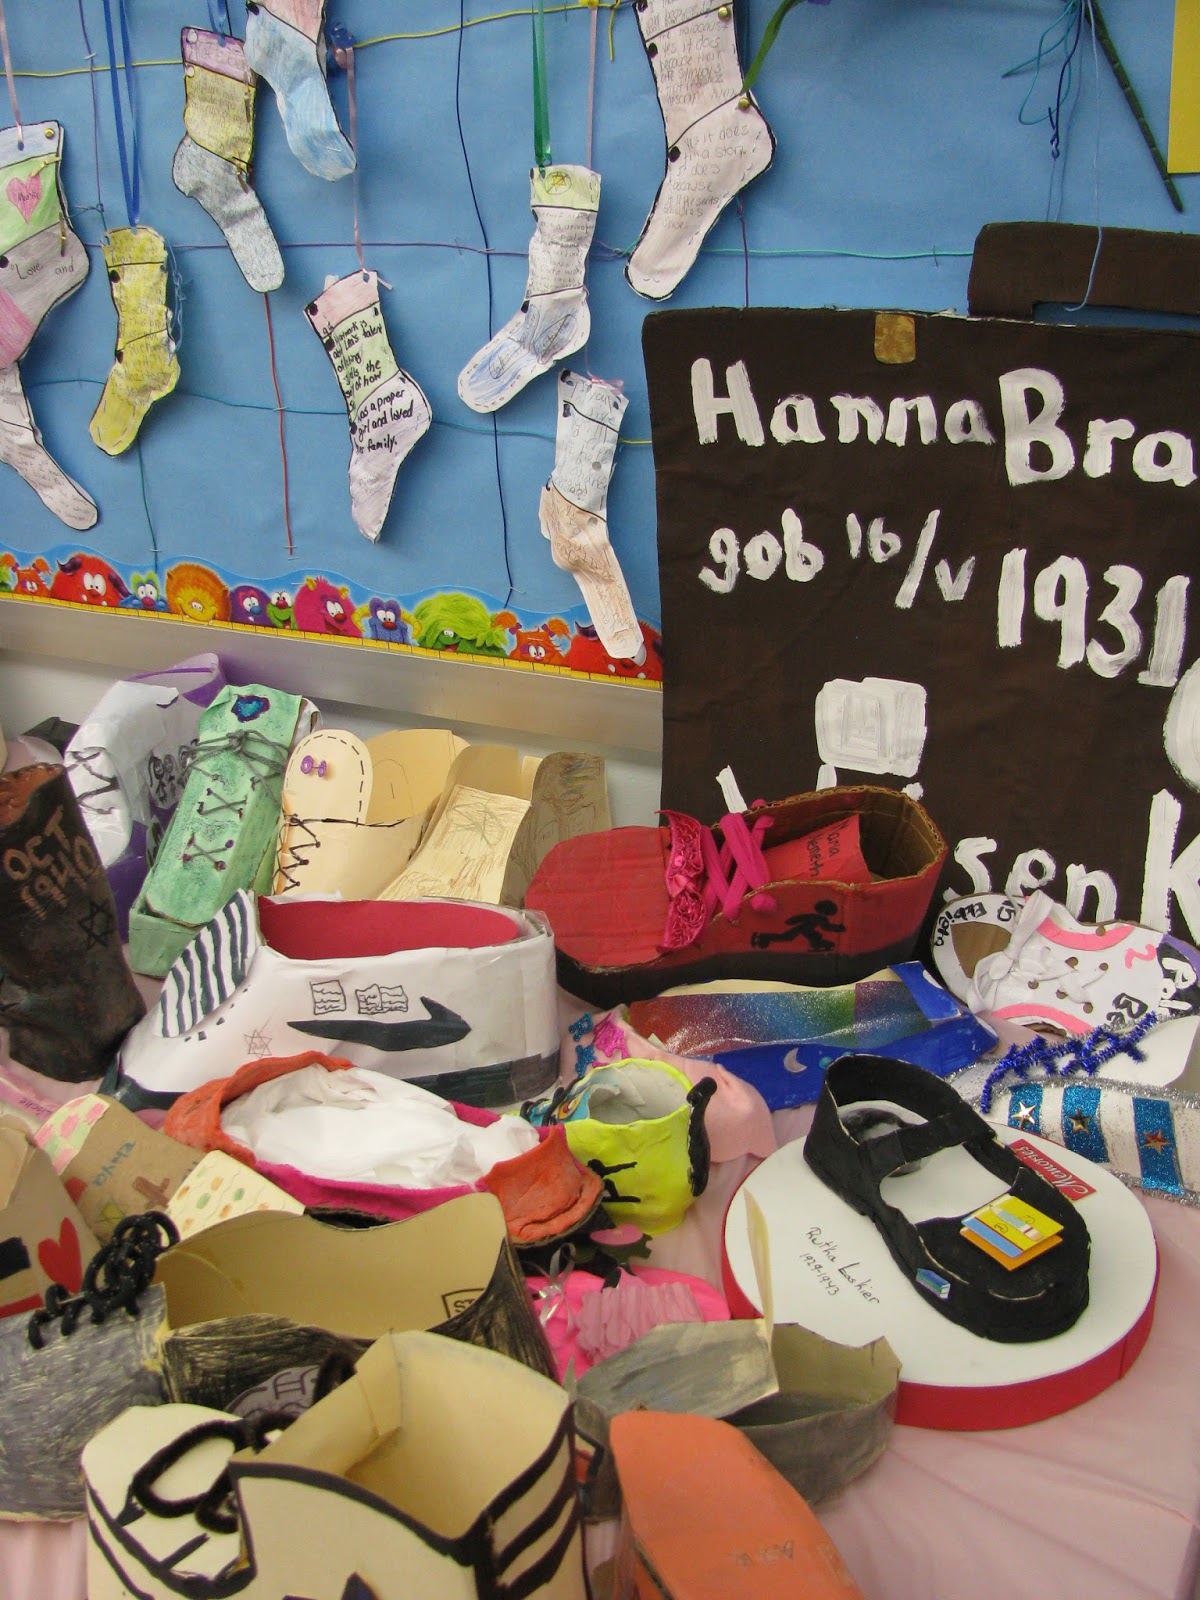
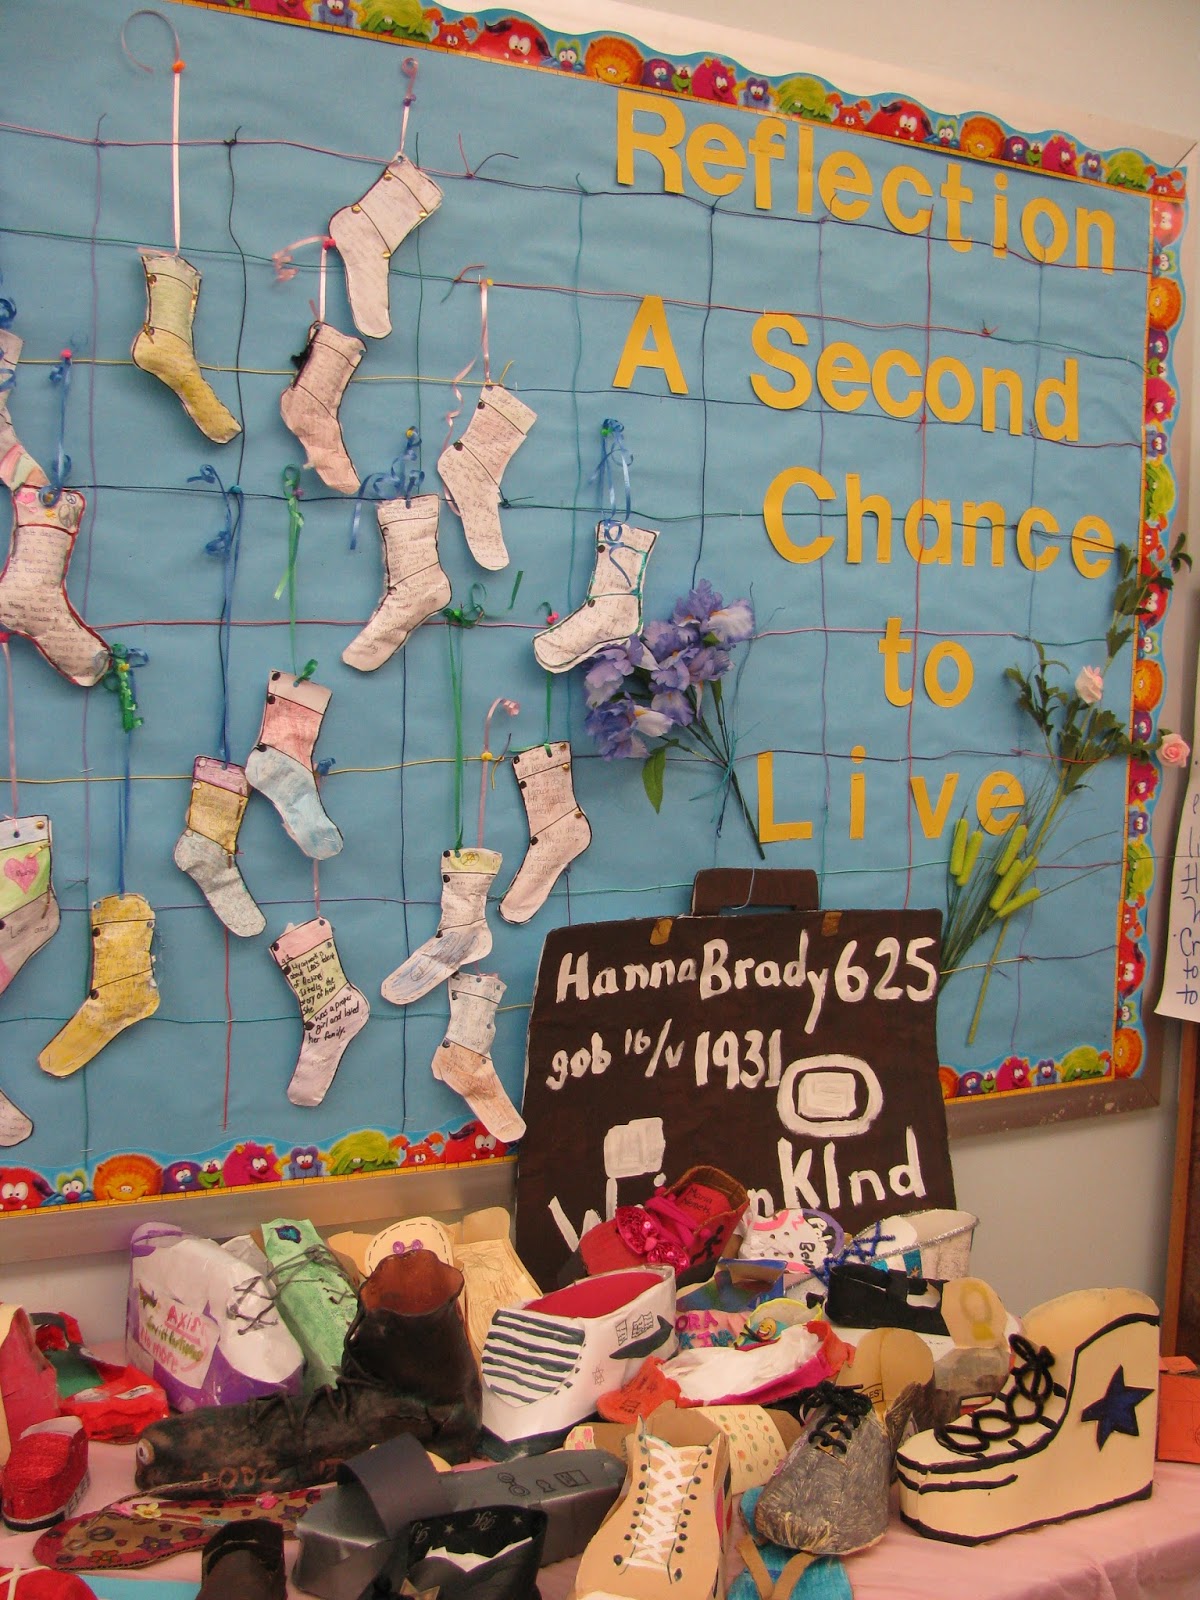


Through the book Hana's Suitcase, the students explored how an object, or artifact, can be used to remember someone, tell their story and add meaning to their memory. They wrote their reflections of the project on paper socks, which they hung on a wire background, symbolizing the barbed wire of the concentration camp where Hana perished. Each student was given the identity of a child who perished in the Holocaust and charged with the task of building a shoe to memorialize them.
A very interesting project and a theme and form that I have also worked with. Both projects get such a tangible link to this part of European history.
ReplyDeletehttps://petersansom.wordpress.com/2014/04/03/serious-content-in-a-teenage-artwork/
https://petersansom.wordpress.com/2014/09/17/is-that-my-work-in-a-museum/
ThAnk you for sharing those great projects Peter. One of the best ways to engage students is to address big ideas and questions into the classroom. Kids need to know that their art can make a difference.
Delete