Please click here to read my post Atmospheric Perspective before you begin this project.
You will need some paper, a pencil, some paint brushes, two small bowls and some black acrylic paint.
Start out by drawing a few trees for practice on a separate piece of paper.
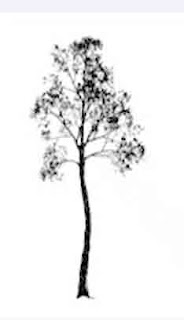
For this project you will need to know how to make trees without leaves. Use this worksheet to learn how:
You can draw all of the trees below
(or make up your own)
by following the same basic formula:

Now you are ready to paint.
Spread newspaper on your work surface.
Get out a clean sheet of paper and pour some acrylic paint into one bowl. Fill the second bowl with water.
Here is a basic selection of
watercolor brushes:
Dip your mop brush into the water and then stir it in the black paint. Go back and forth between the water and the paint until the water is dirty and the paint is watery.
You will use the paint for the trees in the foreground and the gray, dirty water for the trees in the background.
Load your detail or mop brush and start at the bottom of the page. Press the brush down and lift it up as you paint in an upward motion to create the trunk of the tree.
If you always start your brush stroke at the bottom and lift your brush slightly off the page as you paint upwards, the trunk and branches will automatically become narrower as they grow upwards.
Use your gray water to paint the horizon in light gray.
Use your black paint to create your first tree. Start at the bottom of the page. Make the tree overlap the horizon line.
Add your next tree higher on the page. Make it smaller than your fist tree. Use the gray water, not the paint, for the second tree.
Continue to add trees. Each new tree should start higher on the page and be smaller than the one in front of it. Make the trees in the background lighter and less detailed than the trees in the foreground.
Helpful Hint:
If you wish to create trees with leaves on them, add the leaves using a dry sponge dipped in a small amount of paint. You can also add leaves using a fan brush. practice creating leaf textures,using various brushes,
on a separate piece of paper.
on a separate piece of paper.
Atmospheric perspective
in photography, painting and print making
 |
| An Oak Tree in Winter By William Henry Fox Talbot J. Paul Getty Museum, Los Angeles |
 |
 |
| Waiting for Guests at Lamplight by Ma Lin |
 |
| Layered Mountains and Dense Woods Zhuran, 10th century |
 |
| Lovely, Dark and Deep by Rachel Wintemberg (The Helpful Art Teacher) |
 |
| Woods on a Snowy Evening By Rachel Wintemberg (The Helpful Art Teacher) |
 |
| New Year's Eve Foxfires at the Changing Tree Woodblock print By Hiroshige Brooklyn Museum Click here to read the mythical story of this mysterious picture |


Cool. *-* Can you draw a snowy graveyard with one oak tree and a young girl for me. I need it for school. HOPE U CAN HELP.
ReplyDeleteSorry, I don't draw pictures for students but check out the picture by Caspar David Friedrich, Monastary Graveyard in the Snow. You can find it on Google
ReplyDeleteThis was really helpful for me. Thanks a bunch.
ReplyDelete