Imagine you were only an inch tall and lived in a giant city make out of blocks. Imagine matchbox cars zooming past you on the miniature streets. Through the magic of Photo Shop, you can create imaginary worlds and bring your musings to life.
The video below will take you through the complete tutorial step by step. I suggest watching it from beginning to end first and then referring back to it periodically while you are working. I will expect you to apply the skills you already know as well as to try out new tools to create effective images.
I was inspired to create this tutorial by the work of contemporary surrealist photographers Jerry Uelsmann and Maggie Taylor. If you are interested in creating black and white images I would check out Uelsmann's work. If using color is important to you, then definitely take a look at Maggie Taylor. She does some incredible things using Photoshop.
You may also create a black and white image and then selectively add in some color as a finishing touch, using the colorizing techniques I showed you in an earlier lesson here.
Step 1: Build a city of blocks, toys and matchbox cars. Take three photographs of your city; a worm's eye view from below, a street level view and a bird's eye view from above.
Step 2: Have a friend take a photograph of you in front of the green screen.
The green screen photograph of you should match the angle of the shot you took of your block city: Worm's eye view, street level view or bird's eye view.
Open the green screen photograph and delete the background. Open up your block city photographs and delete the backgrounds. Layer the self portrait photograph over the city and resize yourself so that you look as if you could live in the city. Select an interesting imgage to place in the background layer. It could be a sky, a sunset, a corner of a child's bedroom, a gigantic cat or insect about to pounce on you or anything else your imagination can cook up. The best photographs are ones that tell stories.
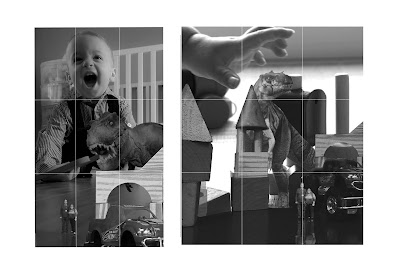
Use the 'rule of thirds' to make sure you have an interesting composition. Very few photographs are perfect examples of the rule of thirds but placing objects close to the intersections of these lines or on the lines will help you to create an interesting, dynamic composition.

When using Google Images to search for assets to complete your picture, click on 'tools' and then size. Select large from the drop down menu. Click on 'usage rights' and select 'labeled for reuse' or 'labeled for reuse with modification' from the drop down menu.


The video below will take you through the complete tutorial step by step. I suggest watching it from beginning to end first and then referring back to it periodically while you are working. I will expect you to apply the skills you already know as well as to try out new tools to create effective images.
I was inspired to create this tutorial by the work of contemporary surrealist photographers Jerry Uelsmann and Maggie Taylor. If you are interested in creating black and white images I would check out Uelsmann's work. If using color is important to you, then definitely take a look at Maggie Taylor. She does some incredible things using Photoshop.
You may also create a black and white image and then selectively add in some color as a finishing touch, using the colorizing techniques I showed you in an earlier lesson here.
Step 1: Build a city of blocks, toys and matchbox cars. Take three photographs of your city; a worm's eye view from below, a street level view and a bird's eye view from above.
Step 2: Have a friend take a photograph of you in front of the green screen.
The green screen photograph of you should match the angle of the shot you took of your block city: Worm's eye view, street level view or bird's eye view.
Open the green screen photograph and delete the background. Open up your block city photographs and delete the backgrounds. Layer the self portrait photograph over the city and resize yourself so that you look as if you could live in the city. Select an interesting imgage to place in the background layer. It could be a sky, a sunset, a corner of a child's bedroom, a gigantic cat or insect about to pounce on you or anything else your imagination can cook up. The best photographs are ones that tell stories.
Use the 'rule of thirds' to make sure you have an interesting composition. Very few photographs are perfect examples of the rule of thirds but placing objects close to the intersections of these lines or on the lines will help you to create an interesting, dynamic composition.


When using Google Images to search for assets to complete your picture, click on 'tools' and then size. Select large from the drop down menu. Click on 'usage rights' and select 'labeled for reuse' or 'labeled for reuse with modification' from the drop down menu.


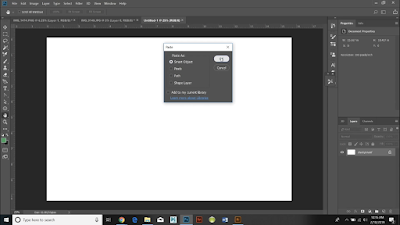
Instead of opening up a file in Photoshop, try opening it up in illustrator, clicking 'select all, edit copy' and then pasting the file into Photoshop as a 'smart object', then resize it as a smart object before clicking on the check mark above the image. By using this technique you can avoid losing details on your image. Once you have resized your object you will need to click on the layer and 'rasterize' the image. This will enable you to delete the background and perform other changes that can only be done to images made up of pixels.

I opened up each asset as a separate file, deleted the background and saved it as a PNG. The PNG format preserves the clear background and will enable me to reuse the images for future projects.
I opened up each asset as a separate file, deleted the background and saved it as a PNG. The PNG format preserves the clear background and will enable me to reuse the images for future projects.
  |
| If you make a mistake and need to go back to an earlier version of your file, click 'window' and then 'history'. You can go back into the history and click on a step and then click on the garbage can. This will allow you to go back to an earlier version of the file you are working on. Please note, you can't edit the history once you have closed the program and logged off. This only works for changes made during a single work session. It's a good idea to save multiple versions of your file and to save the various assets (layers) as separate PNG files. |
| ||
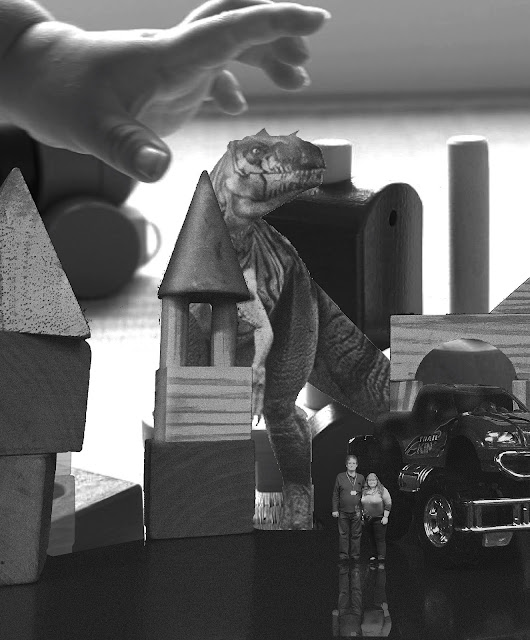
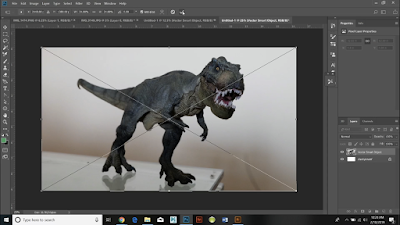
To create a reflection, click layer, duplicate layer, edit, transform flip vertical. Then Change that layer from 'Normal' to 'Soft Light' Then click 'filter, blur, motion blur' Slide the motion blur until the reflection matches the reflections in the rest of the photograph |

 |
| I was able to remove distracting irrelevant details in this picture by using the lasso tool and then clicking 'edit, fill, content aware'. This does not always work perfectly but can sometimes be an extremely helpful short cut. |
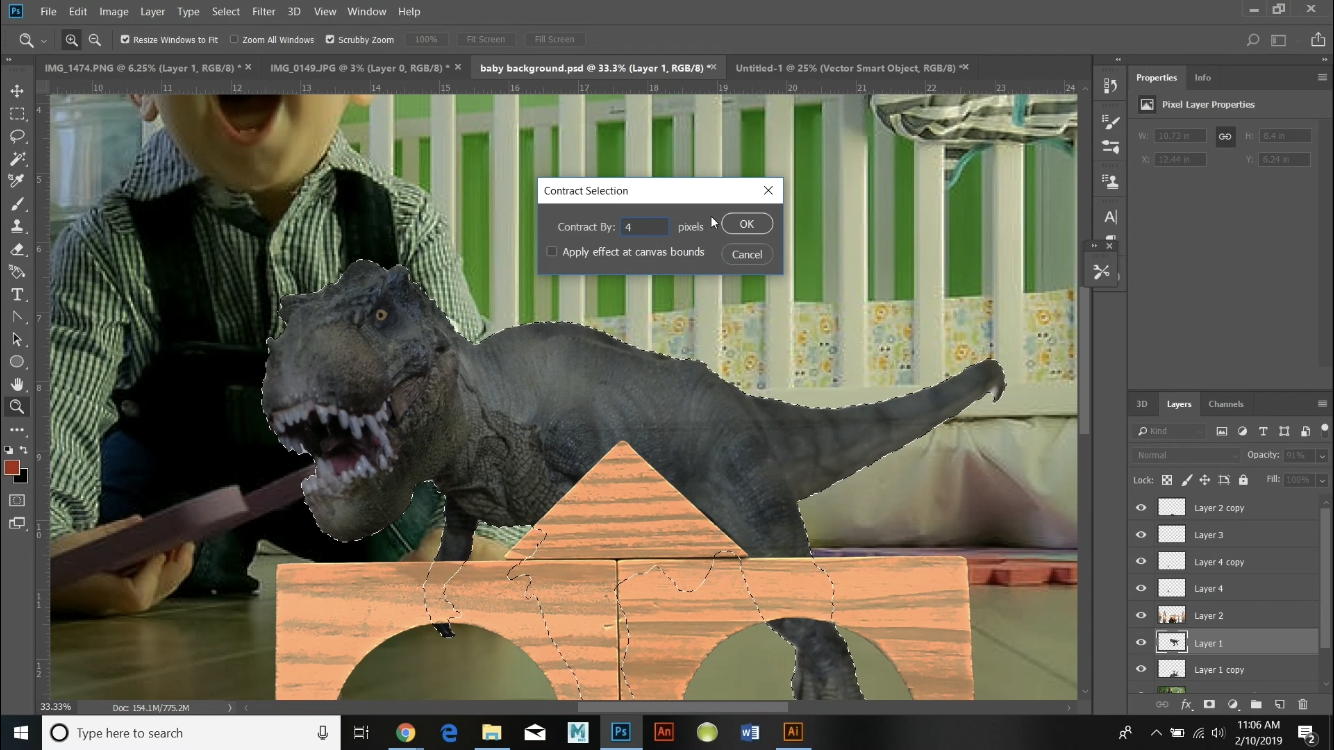 |
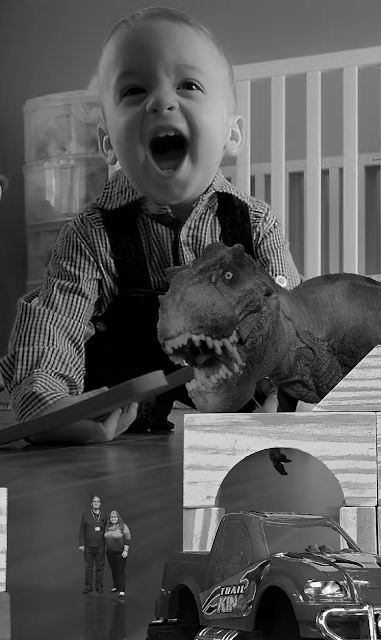
| We have been using the 'select subject' tool a lot and it is incredibly useful. But sometimes you get a pesky halo of pixels around your subject and they make your entire picture look less convincing. Just click select, subject, modify and contract. In this case I contracted the selection by 4 pixels. I then clicked select, inverse and cut. Voila! No more pesky halo around my Tyrannosaurus. |
| Remember, the most important thing is the story your picture tells. In this case, my picture tells a much more compelling story if my tyrannosaurus if facing in an not out of the picture frame. I had to click edit, transform, flip horizontal on both the dinosaur and his reflection. I also decided to click edit, transform, rotate to make him look as if he was lunging at me and my co-worker, David Garb. Ultimately, I ended cropping many things out of the final picture. I kept only the elements that were essential for telling the story of two clueless people, oblivious to the dangers right behind them. I used the rule of thirds to create the most engaging image possible and cropped out anything that I deemed distracting or irrelevant.  |
Required elements of the block city assignment:
Must include the blocks.
Must include you.
The picture of you must be taken from the same point of view as the blocks (worm’s eye view, street level view, bird’s eye view).
You must include reflections and shadows.
Must include a background either from the Internet or from your own phone.
Must tell a story.
Must include cropping and color adjustments that help the picture tell your story more effectively.
Do not delete earlier versions from Google Classroom. I need to see your progress.
Looking for camera equipment? Amazon has some seriously good deals and making purchases through this link will help support this page:
No comments:
Post a Comment