
What do math class, Albrecht Dürer, Egyptian tomb paintings, Vincent Van Gogh, Chuck Close and the assignments below have in common?
Print out these two worksheets to learn how to use a grid to draw and change the size of just about any picture:

Is it 'cheating' to use mathematics to figure out how to copy and enlarge a picture? No. As a matter of fact, humans have been using mathematics to create art since the
beginning of recorded history.
beginning of recorded history.
When 6th grade mathematics teacher Amanda Solomon approached me about collaborating on a project involving art and math I was skeptical. How would the students feel about doing mathematics during art class?
How would they feel about getting a math grade for their art project? This assignment was so successful that the rest of my students have been begging to do it too.
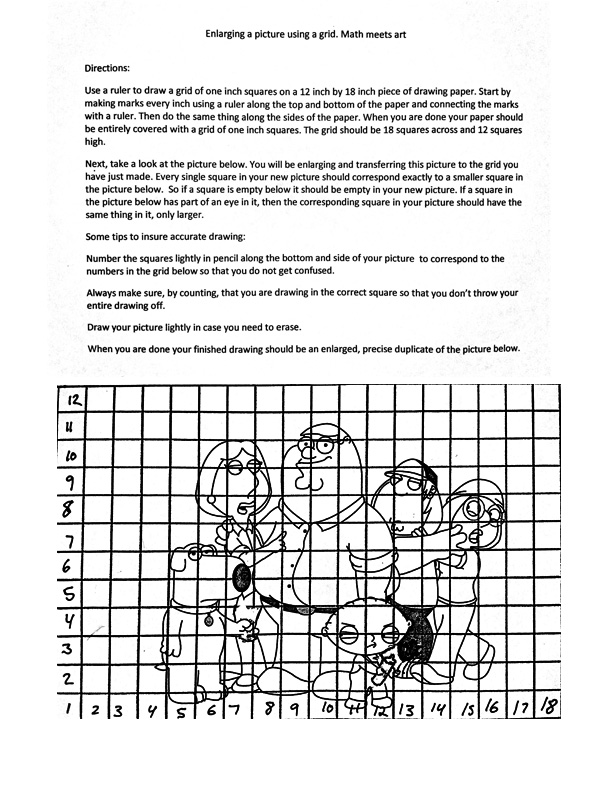
Feel free to print out the worksheets above and try drawing the cartoons. You will need 12"x18" paper, a pencil and a ruler.
GRID DRAWING THROUGHOUT HUMAN HISTORY


To learn how famous Renaissance artists like Albrecht Dürer used grids, like the one above, to draw the world around them, click here.


Albrecht Dürer's Perspective Machine of 1525
For information about how artists have created and used drawing grids throughout history click here.
For directions on how to create your own drawing grid, to let you see the world in perspective, click here.

To read the letter Vincent Van Gogh wrote to his brother describing how he used the grid, originally designed by Albrecht Dürer, to create this painting, click here.
To learn about Chuck Close, a modern artist who uses a grid to help him paint huge portraits, click here.
Here is a project you can do at home using just a computer and a printer.
Do an image search to find something you are interested in drawing. Copy and paste the image into any word processing program, such as Microsoft Word,
center it on the page and print it out.
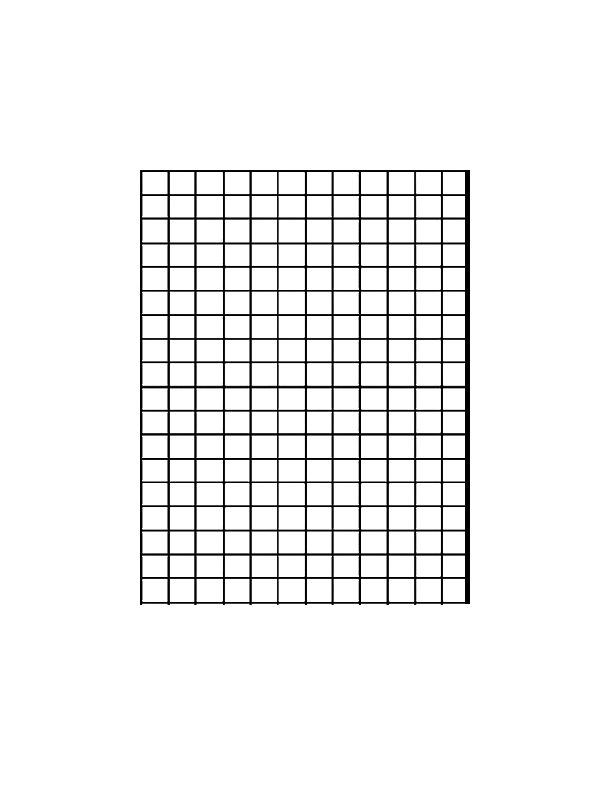
Place the paper back into the printer and print one of the grids below so that it appears on top of your image.
You will most likely have to re-size your image to get it to fit inside the grid. You will probably also have to press the 'Enter' key a few times before pasting the image into 'Word' so that it is in the center of your paper.
If the picture goes off the edge of the grid the first time you try printing it, try using the other grid instead. One of the grids is horizontal and the other is vertical so one may work better than the other, depending on the dimensions of your image. You may have to play around with re-sizing your image and pressing the 'Enter' key to get it to fit under the grid just the way you want it to.
The grids below are 12x18 squares. If you draw a grid of one inch squares on to a 12"x18" piece of paper you can enlarge any image. When you use a grid to help you draw you will be standing on the shoulders of many great artists.
You might just have some fun learning math too!

For information about how artists have created and used drawing grids throughout history click here.
For directions on how to create your own drawing grid, to let you see the world in perspective, click here.
To read the letter Vincent Van Gogh wrote to his brother describing how he used the grid, originally designed by Albrecht Dürer, to create this painting, click here.
To learn about Chuck Close, a modern artist who uses a grid to help him paint huge portraits, click here.
Here is a project you can do at home using just a computer and a printer.
Do an image search to find something you are interested in drawing. Copy and paste the image into any word processing program, such as Microsoft Word,
center it on the page and print it out.
Place the paper back into the printer and print one of the grids below so that it appears on top of your image.
You will most likely have to re-size your image to get it to fit inside the grid. You will probably also have to press the 'Enter' key a few times before pasting the image into 'Word' so that it is in the center of your paper.
If the picture goes off the edge of the grid the first time you try printing it, try using the other grid instead. One of the grids is horizontal and the other is vertical so one may work better than the other, depending on the dimensions of your image. You may have to play around with re-sizing your image and pressing the 'Enter' key to get it to fit under the grid just the way you want it to.
The grids below are 12x18 squares. If you draw a grid of one inch squares on to a 12"x18" piece of paper you can enlarge any image. When you use a grid to help you draw you will be standing on the shoulders of many great artists.
You might just have some fun learning math too!
You can quickly and easily make a simple view finder grid using thread, some tape and a picture frame or mat. I selected a mat that had a window opening of 3"x4.5". I decided to draw on a piece of 12"x18" paper. This worked well because everything I drew was exactly four times as large as the picture I was copying.
 Use a ruler to find the middle of each side of the window and tape the thread to the back of the frame.
 Turn the end of the thread and tape it a second time, as pictured below. This will prevent it from becoming loose later.
 Now place your frame over any picture you wish to copy or hold it up to view anything you wish to draw.
 I have decided to copy and enlarge a drawing by Andreas Vesalius
Next, divide your drawing paper into fourths. It is best to do this with a ruler since folding your paper creates
unsightly crease marks.

Focus on the top left box of the picture you are copying. Look at the edges of the skeleton in the picture below. Forget the details for now and focus only on how the outside contours of the figure fill the rectangle.
Draw a contour line that goes off of the edges of the upper left hand box of your paper at all the same places as the picture you are copying. In my case, the picture I drew was four times as large as the picture I was looking at.


Albrecht Dürer used his invention to learn and record information about the world around him.
By looking through his perspective machine, Dürer was able to accurately translate three dimensional objects, people and landscapes on to a flat picture plane hundreds of years before the birth of photography.


Next, divide your drawing paper into fourths. It is best to do this with a ruler since folding your paper creates
unsightly crease marks.

Focus on the top left box of the picture you are copying. Look at the edges of the skeleton in the picture below. Forget the details for now and focus only on how the outside contours of the figure fill the rectangle.
Draw a contour line that goes off of the edges of the upper left hand box of your paper at all the same places as the picture you are copying. In my case, the picture I drew was four times as large as the picture I was looking at.

After you have drawn the edges of the form, you can go back and add the details.

By looking through his perspective machine, Dürer was able to accurately translate three dimensional objects, people and landscapes on to a flat picture plane hundreds of years before the birth of photography.
To see an excellent documentary by the BBC on Albrecht Durer and the Northern Renaissance, click on this link: http://www.artfinder.com/artist/albrecht-durer/videos/ Please note: The documentary is suitable for high school students or older. Many of Durer's works have Biblical themes and contain nudity in that context (his illustrations of Adam and Eve, for instance). The film is a valuable resource for teachers and advanced students wishing to gain a greater understanding of Renaissance art. Most people are familiar with Durer's artwork without even realizing it because of his famous drawing of the hands at prayer.
X PLUS DIAMOND HASHTAG GRID DRAWING METHOD
I love this method because it's so easy and requires minimal measuring.

 |
| Draw an X with a ruler from each corner, so the lines cross in the middle |
 |
| Make a mark exactly half way down the side of the page |
 |
| If you draw the line across the page starting at the dot and going through the middle of the page it will also be half way up on the other side. So you only have to measure once. So much easier than the traditional grid method. |
 |
| Repeat this process on the other sides of the page, measuring half way up and drawing the line through the center of the X to the other side. |

 |
| Connect the points of the cross to create a diamond shape |
 |
| Draw straight lines from one end of the page to the other wherever the lines cross over each other, so that you are bisecting each diamond on the page. |
 |
| The grid above is not quite finished. I still need to draw the horizontal lines so that there is a cross inside of each diamond. |
 |
| If you draw the identical grid on a picture the same size, you can easily copy the picture, box by box. The video below will show you how to also enlarge the picture, using this same technique. |
Creative Challenge:
If you could gaze into a crystal ball, what do you think you would see?
Print out the spherical grid template below and, on a separate paper, a picture you are interested in drawing. Draw an X plus diamond hashtag grid on the second paper and then copy the image, box by box, onto the other paper, with the spherical grid sheet underneath as a guide. The picture will become distorted, more compressed at the bottom and stretched in the center of the sphere. Is the image inside the sphere or reflected back at you from the surface? You decide. Please watch the video below for a demonstration.


And 'Three Spheres II'

If you could gaze into a crystal ball, what do you think you would see?
Print out the spherical grid template below and, on a separate paper, a picture you are interested in drawing. Draw an X plus diamond hashtag grid on the second paper and then copy the image, box by box, onto the other paper, with the spherical grid sheet underneath as a guide. The picture will become distorted, more compressed at the bottom and stretched in the center of the sphere. Is the image inside the sphere or reflected back at you from the surface? You decide. Please watch the video below for a demonstration.

I was inspired to develop this assignment after looking at MC Escher's Hand with Reflecting Sphere.

And 'Three Spheres II'

COMMON CORE MATH STANDARDS THAT ARE APPLICABLE TO THESE DRAWING PROJECTS
very informative! I like the idea of using a frame and string to show quadrants!thank you
ReplyDeleteThis was very helpful!!
ReplyDeletei saw a drawing book with that in the page never knew what that was for but im gonna make one of tracing paper first have to learn how to make it half like in this picture.
ReplyDeleteQUITE INFORMATIVE.
ReplyDeleteThe pictures seem to be missing....
ReplyDeletemight be your firewall. Try a different browser like chrome.
DeleteI just checked and can see all the pictures just fine
Deletebookmarked!!, I really like your web site!
ReplyDeleteThanks for this info. Dream
ReplyDelete