Creating Animated Graphic Symbols and Motion Tweens in Adobe Animate
You will need a subscription to Adobe Creative Cloud to complete this lesson. We will be using the programs Adobe Photoshop and Adobe Animate. We will also be using the Adobe Media Encoder to export our animation as a video.
You will also need to download these four stick figure project files and the green screen color image. Right click on them to open them full sized in a new window before downloading them.


Unlock background and use magic wand to delete the white
background on all four files. Save each image as a Photoshop file. Don't rename them.

File, Scripts, load files into stack

Use the ‘move’ tool to move all four figures on top of each
other.

Create Frame animation
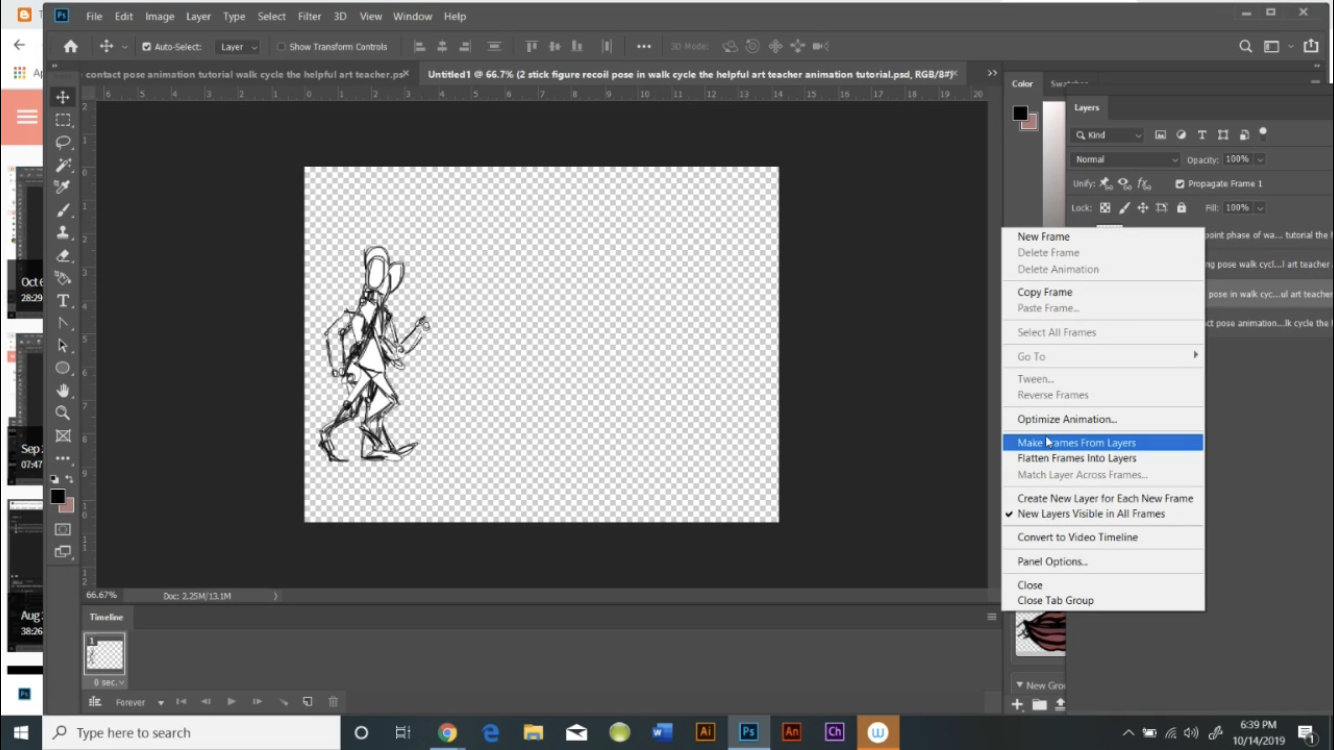
Make Frames from Layers

Save as a Photoshop file. Name it ‘Walk Cycle Image Stack’

Open ‘Adobe Animate’ and create a full HD animation at 24
frames per second (You need to change the FPS)

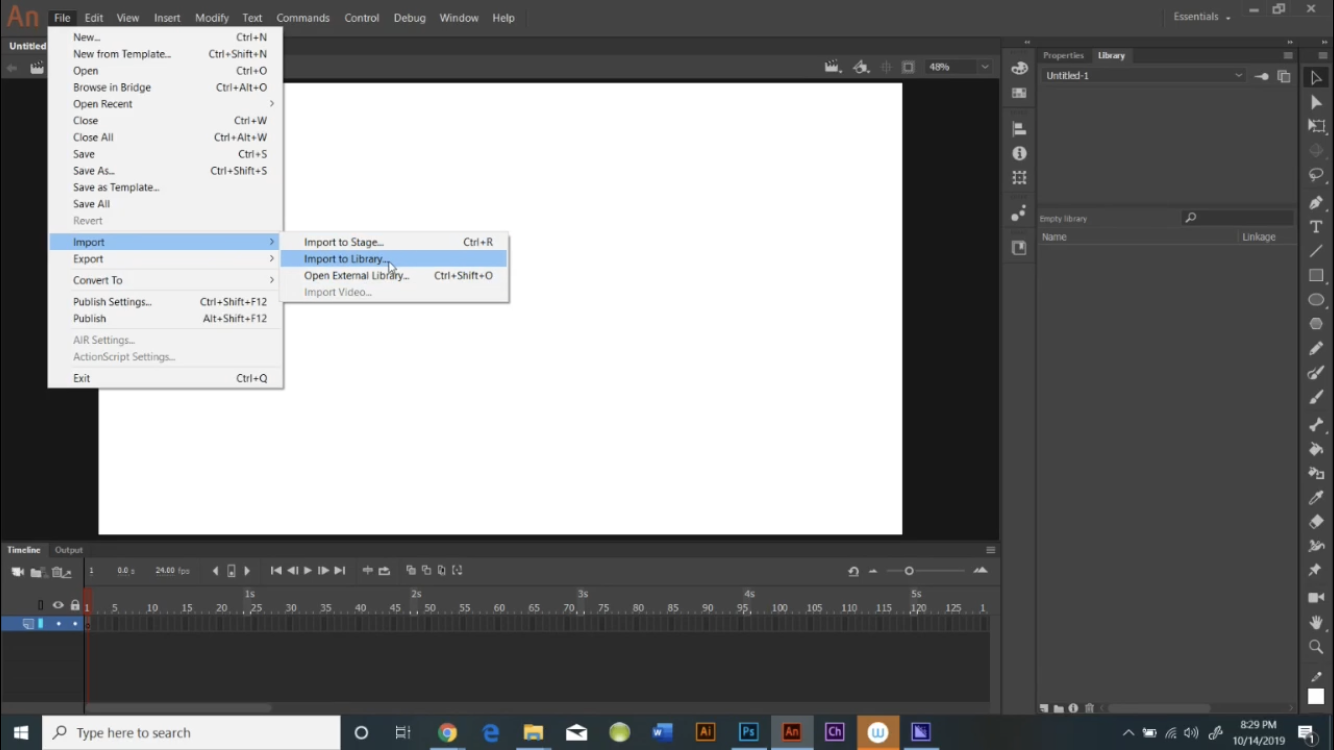
File, Import, Import to Library. Import the ‘Walk Cycle image stack’
file.

Make sure all four layers are checked off and change
settings to ‘convert layers to keyframes’

Insert ‘New Symbol’

Name the new symbol ‘walk cycle’. You want to create a
Graphic symbol. In the library, click on the ‘walk cycle’ symbol you just created. This will put
you INSIDE the symbol. In the library, open the folder called ‘walk cycle image
stack’. Drag the first layer onto the timeline.

Right click on the frame on the timeline and click ‘copy
frame’

Right click, ‘paste frame’. Every frame should appear twice
in a row on the timeline. This will make the movements appear smoother.

On the next space in the timeline right click and ‘insert
blank keyframe’ then drag the second frame in the walk cycle on to the
timeline.

In order to be able to see where to position the figure, you
will need to turn on the ‘onion skin’ feature (shown with the arrow in the
picture above).
Position your second figure directly on top of your first figure, matching up the legs and head as closely as possible.
Position all subsequent figures directly on top of the previous one. When your animated graphic symbol is complete, it should look like a person walking in place, not a person walking forward. This is very important. You will create the forward path later, when you create your motion tween.

Once you have all the frames on the timeline, you will need
to exit the symbol and return to ‘scene 1’ by clicking on the back arrow.


Drag the ‘walk cycle’ graphic symbol you just created onto
the timeline so that it is just off the left side of the stage.

Right click on the timeline and ‘create motion tween’

Drag out the timeline to the 3 second mark

Drag the figure across the screen to just off the right side
of the stage. This will create a motion tween.

You will see a dotted line, showing the motion path. You can
adjust the motion path by dragging the line. At this point you can test out your animation and you should see your stick figure walking across your stage. Unfortunately, the default background color, if you don't add in a background, is black. So if you exported the video now, you would barely be able to see it. We will be adding in a green screen colored background.


Click on the layer and ‘insert layer’ Drag the layer to the
bottom.

File, Import, Import to stage,

Import green screen color to stage. You have now assembled all the components of your animation. Name and save your 'Adobe Animate' file.

File, Export, Export Video.

Designing an original cartoon character
Think of personality traits you would like your character to have. How would you depict those traits in a drawing? Is your character young or old? An adult, teen or child? Male or female? What type of hair and clothing do you want them to have?
Think of personality traits you would like your character to have. How would you depict those traits in a drawing? Is your character young or old? An adult, teen or child? Male or female? What type of hair and clothing do you want them to have?
Now that you know how to create a walk cycle, an animated graphic symbol and a motion tween, and you have a basic understanding of how to use the 'Adobe Animate' program,
go back to the four 'walk cycle' images you saved in Photoshop. Add a layer to each file and, using the stick figures as a guide, for size, proportions and pose, create a walk cycle animation of your own, original cartoon character.
To download and use a greater variety of walk and movement cycle templates, click here:
Just right click to open the image full size in another tab, download, open in Photoshop and create your own original characters in the layer above the images, using the size, proportions and poses as a template. Then stack the images the same way you did in the above exercise and create your own original animations.
Here is a detailed tutorial for creating a walk cycle of your own original cartoon character:
Here is a detailed tutorial for creating a walk cycle of your own original cartoon character:
For instructions on creating the cityscape background,
please click here:
For the project files, to get you started designing your original character, please click here:
Below are videos I have created for my computer animation classes on adding color to your digital artwork:
Once you have created and colored a walk cycle of your original character, save it as a JPEG.
Open the JPEG, unlock the background, and delete the white background using the magic wand. Next, duplicate the layer 5 times. Erase all but one of the figures in each layer, so that each step of the walk cycle is in a different layer. Then move each figure so that they are all lined up, stacked exactly on top of one another. Then follow the same sequence of directions as above to create a walk cycle of your original character. Instead of using a green screen background, use the city scape image that you created earlier or create a simple background in Photoshop.
The dimensions of your background should be 1920x1080 pixels, with a resolution of 300 pixels per square inch.
Thank you so much for these tutorials. This is really helpful and easy to understand. I am learning easily. Great work done by you.
ReplyDelete