Before watching the video, look at the steps below to get an idea of the drawing process.
After watching the tutorial, print out the worksheets
and use them as a guide.
For additional face shading lessons, click on the links below:
 |
| Step 1 |
 |
| Step 2 |
 |
| Step 3 |
 |
| Step 4 |
 |
| Step 5 |
 |
| Step 6 |
 |
Work in progress: Initial shading with the contour lines removed.
Even with only a minimal amount of shading, the drawing still has a sculptural feel |
 |
| Step 7 |
 |
Worksheet 1
The finished picture
Use an eraser to create highlights |
 |
Worksheet 2
The drawing process from start to finish
LEARNING HOW TO TRANSFORM A CONTOUR LINE DRAWING INTO A VALUE STUDY IS ONLY THE BEGINNING
In the video below, I demonstrate drawing a picture with sculptural, three dimensional qualities.
I was not looking at Michelangelo's David while shading. Instead, I started with a copy of my line drawing of David and began to add highlights, mid-tones and shadows. I thought about both lighting and form but did not refer back to the original photograph. Instead of copying, I applied the concepts from the tutorial to create my own original picture.
My students find it useful to watch this process playing in a continuous loop in the classroom as they draw so they can refer to it any time they get stuck. It is also helpful for them to see how often I make errors, correct them and keep working. I want to dispel the myth that artists do everything perfectly the first time. Much of the creative process is trial and error.
Take your sketchbook with you when you go out and sketch quick contour line drawings of the people you see.
Do not worry if some of the pictures come out distorted.
Afterwards, try transforming a few of your own contour line drawings by adding shadows, mid-tones and highlights. If you aren't comfortable experimenting with your original work, try scanning, tracing or Xeroxing your sketches and play around with the copies. Envision each drawing as a sculpture, lit by a single light source.
I imagined that the sun was slightly above, in front of and to the left of the sculpture.
If you are shading several faces on one page, choose the same imaginary light source for all of them. |
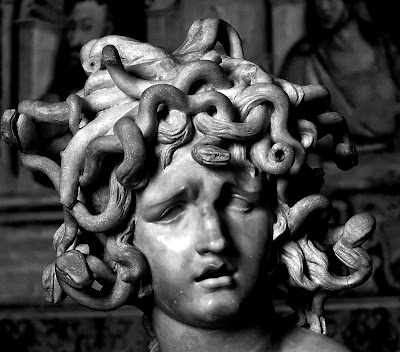
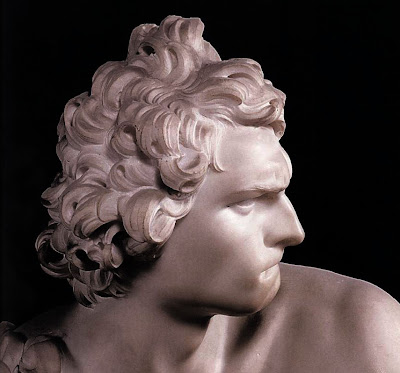
Once you are done drawing David, practice drawing and shading other famous sculptures,using the photographs below. Take photographs of sculptures whenever you see them and use them as models to perfect your drawing technique. Visit a museum with your sketchbook so you can draw and shade in the marble sculptures that you see.
 |
| Head of Apollo by Gian Lorenzo Bernini |
 |
| Medusa by Gian Lorenzo Bernini |
 |
| Pope Gregorius XV by Gian Lorenzo Bernini |
 |
| bust of scipione borghese by Gian Lorenzo Bernini |
 |
| bust of scipione borghese by Gian Lorenzo Bernini |
 |
| David by Gian Lorenzo Bernini |
 |
| portrait of Costanza Bonarelli by Gian Lorenzo Bernini |


A real treat and so informative. Excellent says it all.
ReplyDeleteThank you for these excellent lesson. I'm a teacher of Art History. I will sure use in my class (italian scientific high school)
ReplyDeleterocco fiumara
(I'm also recently designing for VIDA:)