Watch the video below for step by step instructions:
If you would like to test out the Wick Editor using my walk cycle figures and background, all the assets for the animation are in this folder on my Google Drive (along with a shortened version of the video above). The shortened video gives just the basic instructions for uploading assets to Wick Editor and creating an animated short.
If you wish to go to the Wick website and just get started, here is the link: https://editor.wickeditor.com/
Before you create any of your own animation assets on the Photopea website, you will need to create a free account by logging in with Google and using your school account.
Otherwise, if you are on a Chromebook, you won't have any way of saving layered Photoshop files.
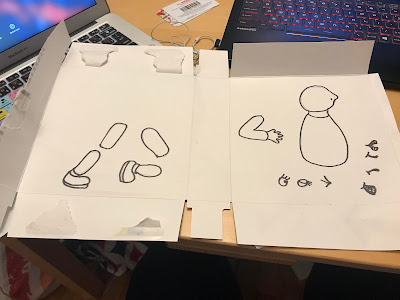
I drew the puppet (pictured below) on a recycled frozen food box. There are surprisingly many sources of free drawing paper around the house.
And scanned it using the free Adobe Scan app on my phone:
The photograph above shows how the exploded view of teh puppet will look once all the parts of the body are in different layers.
A word of warning: In order to save a layered Photoshop file on a Chromebook you will need to create a free Photopea account, publish the PSD on the Photopea website and save the link so that you can access it again later. Here is a short video that explains the process:
You are going to be creating a video using the wick editor, exporting it as an MP4, (not a GIF), and submitting it, along with all your animation assets (your characters and your backgrounds) to Google Classroom.
You will not be able to view your MP4 animation, once it has been exported, on your chromebook until after it has been uploaded and processed in Google classroom. You might need to wait a while before being able to view the finished product online.
If your character is an animal, use this book as a reference:
If your character is human, use this book as a reference.
You must draw an 'exploded view' of your character on paper, using a Sharpie and upload two photographs of it to prove to me that you drew it yourself. The first photograph will look like this:

The second photograph will look like this:
You will create it by scanning your artwork with your phone, uploading it to Photopea, rasterizing and unlocking the layer, clicking select>all>edit>copy, pasting it into a new transparent document and saving it as a PNG.
Both the photograph of your drawing and the Scanned PNG are due in Google Classroom on Monday, April 20th at 11:59 PM.
You will then create a background for your animation and use the same procedure to scan, upload and modify it.
The background image is due in Google Classroom on Friday,
April 24th at 11:59 PM
You will then start to create a series of PNG images of your character in different positions and save them in a layered PSD document on the Photopea website. Make sure you create a free account on that website, publish your work to the web in the form of a layered PSD and save the link in a Google Doc at the end of every work session.
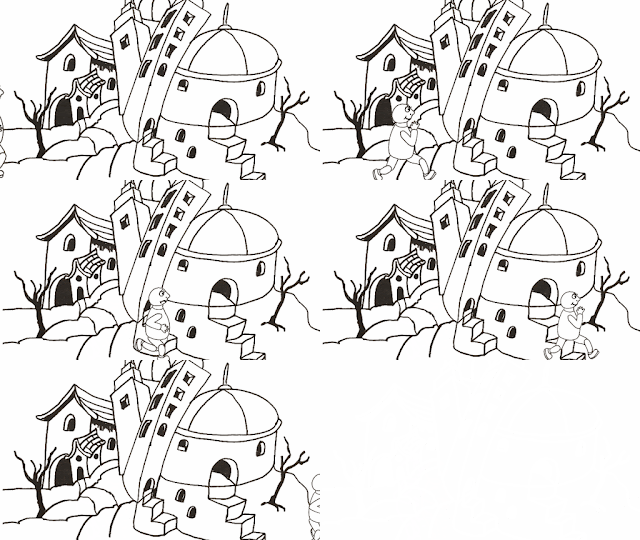
Below are the stages of a walk cycle for you to reference:
The Google Doc, with links to the Photopea website, showing your daily progress, should be continuously updated in Google Classroom, each day that you are working.
Remember, if you are working on a Chromebook, it won't let you save a layered document to the device. You need to be logged in to Photopea, publish your document on the Photopea website and save the URL so you can access it later.
The assignment below is due on May 8th
Create an animation with a scrolling background using the Wick Editor
You may have noticed as you were creating your animations that the characters did not stay on the screen long enough for you to get a good look at them. They ran by too quickly.
Compare the top GIF to the bottom GIF. What do you notice?

The figures in the top GIF are running (or rolling) in place. It is the background that is moving. This is accomplished by creating a backdrop that is wider than the animation stage and scrolling it on a layer below the characters as the animation progresses. Watching the top animation is a visually more satisfying experience than watching the bottom one. Why?
The focal point of the story is not the background. It is the characters. By making the characters run in place while the background scrolls by I enable my audience to comfortably focus on the most important parts of the story and take in all the details.
Below is an example of a scrolling background that I created:
All I needed was a single, much smaller drawing. I outlined the drawing with Sharpie Marker, scanned it and uploaded the scan to my Google Drive. Below is the original scanned drawing:
In order to do this project successfully,
you MUST first watch this video:
and then this video:
For this assignment you may reuse characters that you created in any previous assignment, as long as they can be made to look as if they are walking, running or otherwise moving. A walk cycle will work. So would a flapping bird or swimming fish.
However, the characters must be your own original design. You may not use a character that was created by another artist, even if you drew the picture yourself.
If you do not want to draw, you can create a walk cycle by taking 6 full shot photographs of someone walking. You must use a side view, remove the background using background burner and save each shot as a PNG with a transparent background.
Use this worksheet for reference:
The idea is to create an animation where the character appears to be moving, but actually the character is walking in place and the background is scrolling by.
Start out by downloading the 'Clear background scroll template' directly below:
You must right click on it and open it in a new window, then click the + sign in the middle of the document, in order to get the correct size.
Open the template in Photopea.
You must draw your own background, outline it with Sharpie, scan it using the Adobe Scan app (a free phone app), open it in Photopea, rasterize it, unlock the background, copy it and paste it on to the 'Clear background scroll template', following the instructions in the two videos.
Please note, while occasionally it makes sense for a character to be hovering in place but still moving (for example a hovering insect, flapping its wings)...
...for the purpose of this assignment, I am going to require that you create a scrolling background with the character or characters moving in place on the layer above.


No comments:
Post a Comment