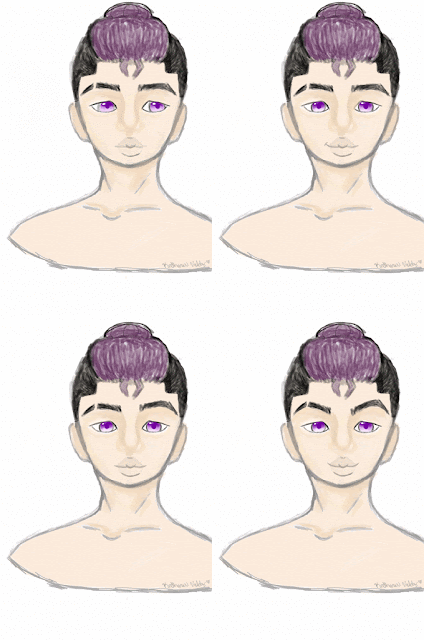
In this video we will create a series of facial expressions, step by step, using the puppet warp tool. For this lesson I created a series of faces, each with a different expression, to generate a GIF, using the timeline in Photoshop. These faces can also be used to create a short animated cartoon in Adobe Animate.
I initially created a PSD that was 1100 pixels wide and 800 pixels high, twice the size of the default Adobe Animate HTML5 canvas, with a resolution of 300 PSI. My objective was to create a very high resolution file with the same aspect ratio as the one I planned to use for my animation, so the images could be resized without distortion or loss of detail.
You will then see how I used 'puppet warp' to create both this face animation and an animation of a swimming mermaid.
Through the magic of 'puppet warp' I only had to draw the face one time in order to create multiple faces. To create the mermaid animation in Adobe Animate, I only needed to draw a single mermaid.
The video below will show you exactly how I did it.
Below are some important screen shots, detailing the steps in the tutorial, to help you out along the way. Remember, if your ultimate goal is to create assets for an original GIF or animation, you need to create a series of images with gradual movements. Please see my article 'How Animation Works' for a complete explanation of why a series of gradual movements work best to fool the eye.
Once you have created your animation assets, numbered them and saved them to a file, you are ready to use them to create an animated GIF, using the timeline in Adobe Photoshop. This is by far the easiest and most rewarding way to begin animating, prior to using Adobe Animate.
The video below will show you everything you need to know to get started:
I created the GIFs below by following the instructions in the above video, step by step, using PNG images I created earlier.
For the face GIF below, I created 11 faces in all. I then created copies of each one for a total of 22 images. Using each frame twice creates a smoother looking animation.
Student Art Gallery
GIFs by Digital Art 1 students, Perth Amboy High School
Don't forget to save your stack of images as a PSD (Photoshop file) so that you can export them later to Adobe Animate and use them to create a key frame animation. The video below explains how:


No comments:
Post a Comment