Welcome to The Helpful Art Teacher, an interdisciplinary website linking visual arts to math, social studies, science and language arts.
Learning how to draw means learning to see. A good art lesson teaches us not only to create but to look at, think about and understand our world through art.
Creating Fantasy Architecture in Photoshop: Take your marker drawings to the next level
In this tutorial you will learn how to take an ordinary drawing, created on paper with a Sharpie marker
Upload it to Photoshop and transform it
into an elaborate, layered, fantasy cityscape.
Please watch the tutorial below:
Here are some helpful tips and tools, created from screenshots of the video, to help you on your creative journey:
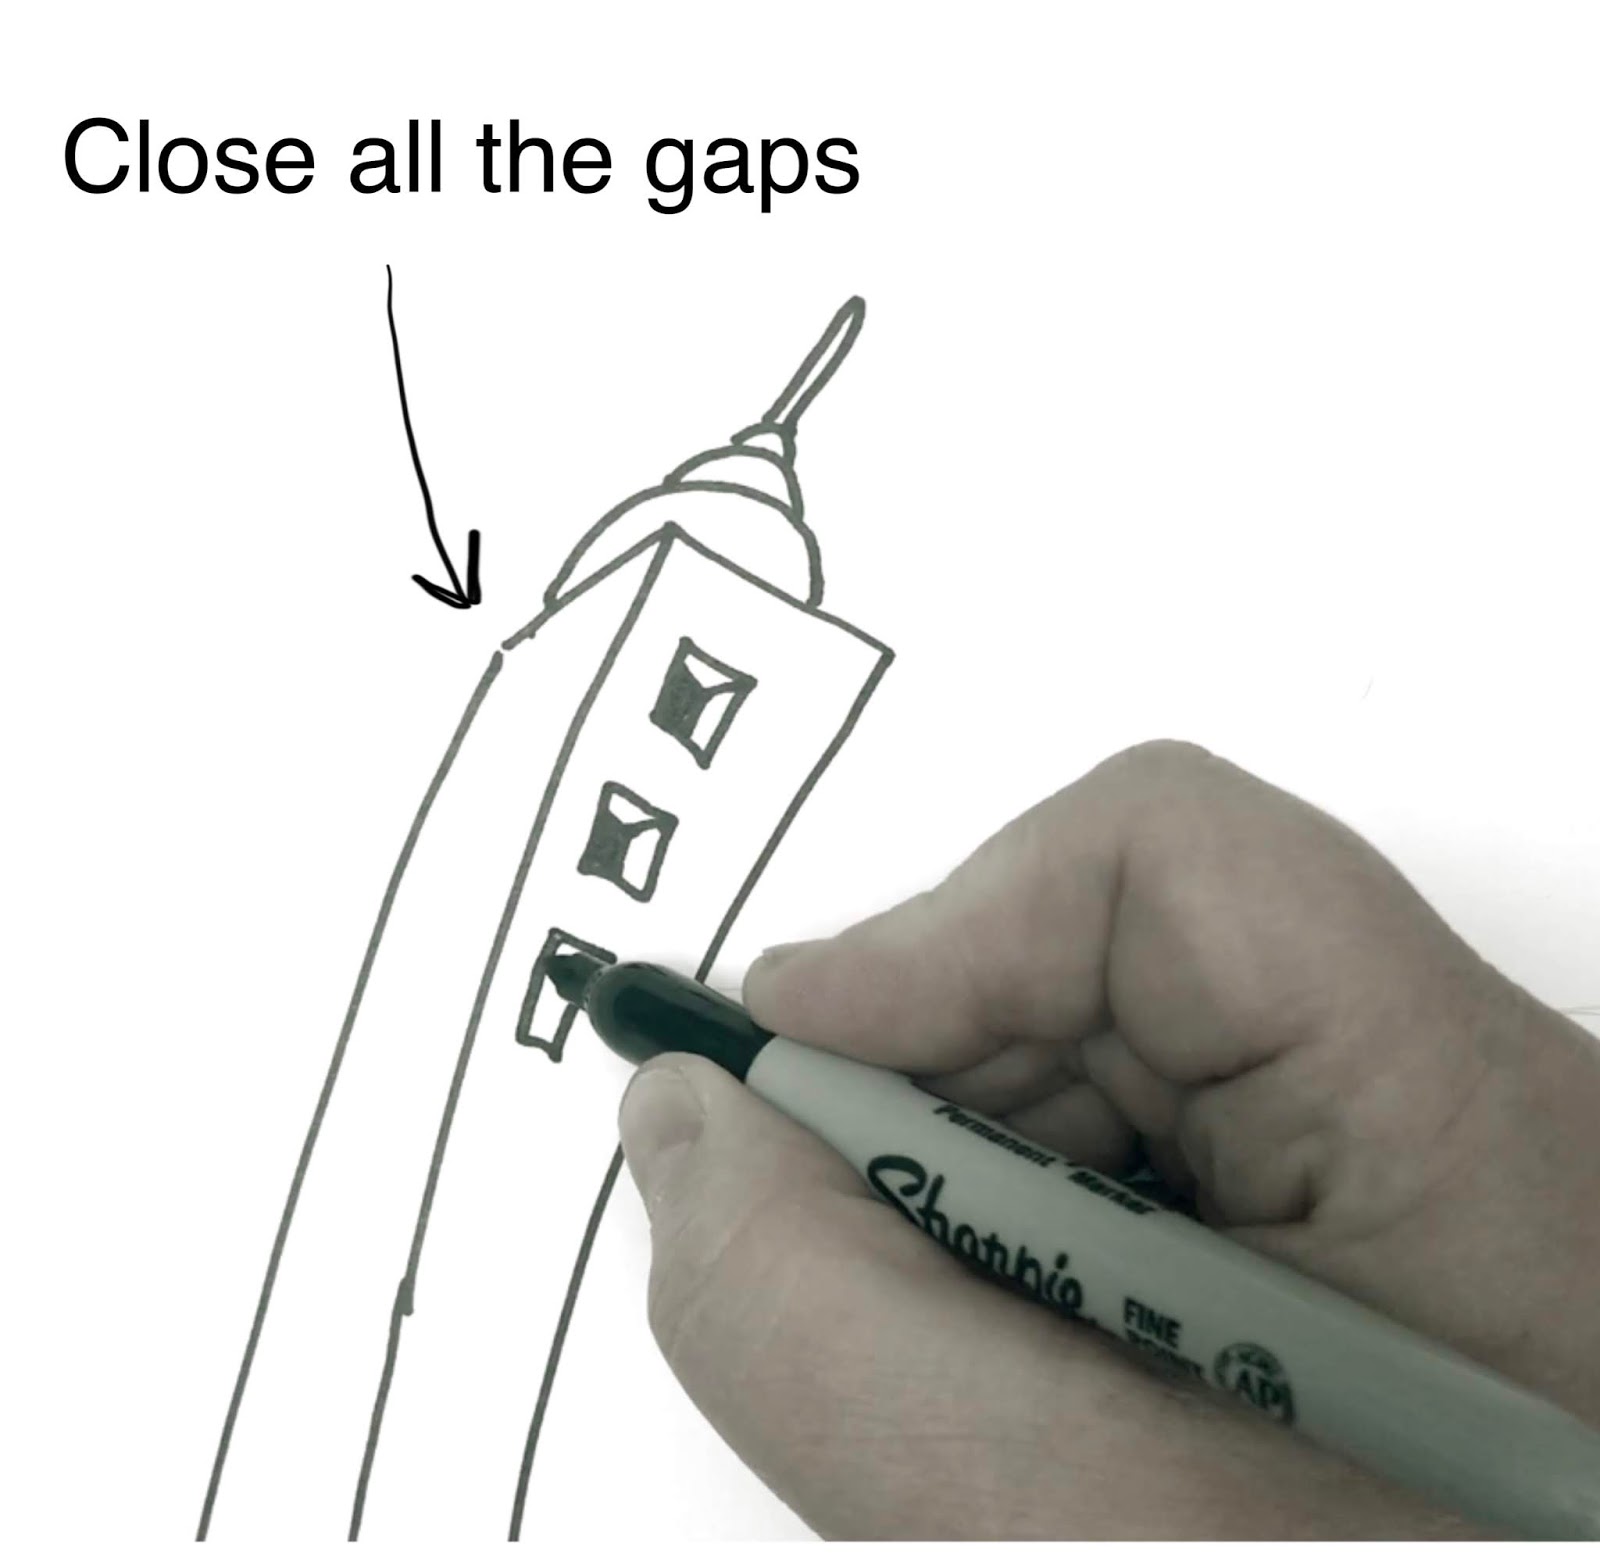
When drawing with sharpie, be sure to close all the gaps where the lines meet. Otherwise you will run into trouble once you try to manipulate your image is in Photoshop.
Photoshop usually defaults to a resolution of 72 pixels per square inch because that is the resolution most photos need to be for Internet viewing. However, if you plan to ever print your pictures you will need to use 300 pixels per inch. Otherwise your images will look grainy. You must change this in the beginning before you do anything else to your picture.
Once I had my image in Photoshop, I noticed it was slightly crooked. Using the rectangular Marquis tool was difficult because I kept accidentally cropping part of my drawing. The solution is to click edit, transform and rotate.
No matter what I did, I was still left with extra 'noise' in my image when I tried to get rid of the background. Noise is unwanted pixels of the wrong color making my picture look sloppy. The solution is to select only the black lines and paste them into a new document.
If the image is in the background layer you will have to click 'layer' and then create a layer from the background. You can then use the magic wand to cut the background out completely. You will know you did it correctly if a gray and white checkerboard appears where the background used to be. Saving the picture as a portable network graphic without a background will enable you to use it over and over again in countless ways.
Your picture is about to get very big. Don't worry. We will shrink it later.


No comments:
Post a Comment