How are the two films similar?
How are they different?
What materials would you use if you could create your own miniature circus?
Look at the unique whimsical circus characters that Calder built. Can you identify some of the materials and common household objects he used? Start collecting things that you might use to design your own circus.
You can see Calder's Circus at
The Whitney Museum of American Art, in New York City.
Here are some materials listed on the museum's website that Calder used to create his magical circus: Wire, wood, metal, cloth, yarn, paper, cardboard, leather, string, rubber tubing, corks, buttons, rhinestones, pipe cleaners, and bottle caps.
One of the tests for creativity is a person's ability to take a common household object and use it in an unconventional way. Where other people saw junk, Calder saw possibilities. How creative are you? What objects can you find around your house to create your own miniature world?
Alexander Calder, Little Clown, the Trumpeteer, from Calder’s Circus, 1926–31. Wire, cloth, paint, yarn, thread, rhinestone buttons, electrical tape, rubber tubing, and metal horn,


Alexander Calder, Elephant and Trainer, from, Calder’s Circus, 1926–31. Painted wood, cloth, rubber tubing, wire, fur, pipe cleaners, cork, and nails,
Below are two chairs, one designed by Alexander Calder, the other designed by Charles and Ray Eames. How are they alike? How are they different?
Like Calder, Charles and Ray Eames approached design challenges with a sense of playfulness and fun. Unlike Calder, Eames created items that were manufactured, mass produced and sold in stores.
Printable Worksheets
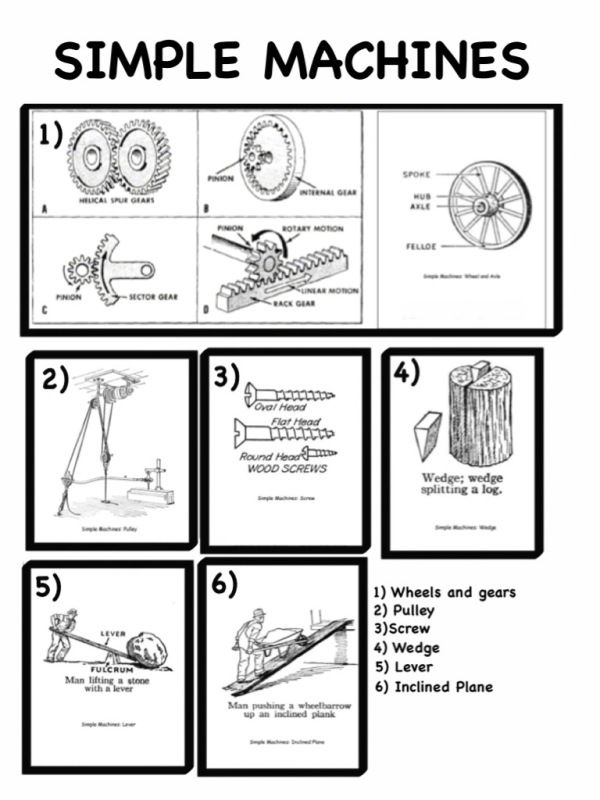
Science connections: Calder's Circus is a kinetic sculpture, because it has moving, mechanical parts. Calder used pulleys, ramps, and other simple machines to bring his art to life. How many simple machines can you identify in the movie? What machines would you create to bring your circus to life? How would you power your own kinetic sculptures?
In 1957 Charles and Ray Eames created the first solar powered kinetic sculpture, called the 'Do Nothing Machine'.
SAFETY TIPS FOR SCULPTING WITH WIRE http://awesomeartists.com/ART/AWesomeAwesomeGettingWired.html
The excellent worksheets posted below come from the Awesome Artists blog written by M.C.Gillis. There are many wonderful ideas on that blog and I encourage you to visit there for lesson ideas and printable worksheets.
|
STUDENT GALLERY
Miniature circuses
Work in progress by my middle school students. I can't wait to see what they come up with next.
We started out by painting the cardboard circus 'rings', applying our previous knowledge of rotational symmetry and Mandala design. We discovered that some combination of red, yellow, blue or white can be found in most circus designs and that they are usually simple, symmetrical and graphic (clear or vivid, like a diagram) with flat contrasting colors.
Next we hot glued in the wooden barbecue skewers after sticking the points into the corrugated cardboard. We used Twisteez brand colored wire for the tightropes. First we twisted the wire in place and then we used hot glue to keep it from slipping. Then students used beads, wire and pipe cleaners to create animals and people.
Some students opted to hot glue their circus characters in place.
The students brought in found objects from home. The ladders were made with hot glue, toothpicks and bamboo sticks from an old placemat.
The students were allowed to take anything they needed from my scrap bag as long as they had a circus related use for it in mind ahead of time. I told them it was like finishing your plate at dinner; they would be required to use everything they took. This forced them to think and plan and minimized waste.
 |
| A piece of lace makes the perfect net |
 |
| Leo jumps through the hoop of fire! |
For the next lesson, I took out Crayola Model Magic, toothpicks and Elmer's glue. I showed the students how to use the toothpicks as an armature (skeleton). We used glue to reinforce any area where two pieces of clay were joined. Each student was allowed one small package of clay. They had to tell me which circus animal they planned to create before I gave them the package.
 |
| Work in progress: This student creates a giraffe |
 |
| Work in progress: using a toothpick armature and markers to add color, these students created a zebra and a clown from Model Magic |
 |
| Check out the seal balancing a ball in the background. |
 |
| The show opens with the national anthem |
 |
| Mr. Bear wants to try the trapeze too! |
"Ha! Ha! You can't catch me with your whip!"
Says Dancing Bear to Mr. Ringmaster
 |
Aging Diva Dancing Bear is ready for her grand entrance.
She steadies herself with her cane as she enters the ring.
|
 |
| Mr. Honey bear is about to walk the tightrope without a net! |
 |
| Hello Mr. Lion! |
 |
| Student ingenuity: A toothpick keeps the seal's neck from slumping, while the clay dries |
Materials: Cardboard circles (free from the school cafeteria, they come from the frozen pizzas)
Wooden barbecue skewers (inexpensive from any supermarket)
Pencils, rulers and compasses (to draw the design on the cardboard base before painting)
Acrylic paint and brushes (my students had to switch brushes when they switched colors instead of washing them. This worked well since we were not mixing colors)
Low temperature hot glue gun (available in the craft department of Walmart for about three or four dollars)
Low temperature hot glue sticks
Pipe cleaners
Plastic beads
Toothpicks (for armatures)
Elmer's glue
Miscellaneous found objects supplied by the students.
Scrap fabric, ribbon, felt and feathers (optional)


Great, thorough post. I've taught lots of Calder projects, but never one like this. Thanks so much for sharing your lesson.
ReplyDeleteWohh just what I was searching for, thanks for posting.
ReplyDelete