 |
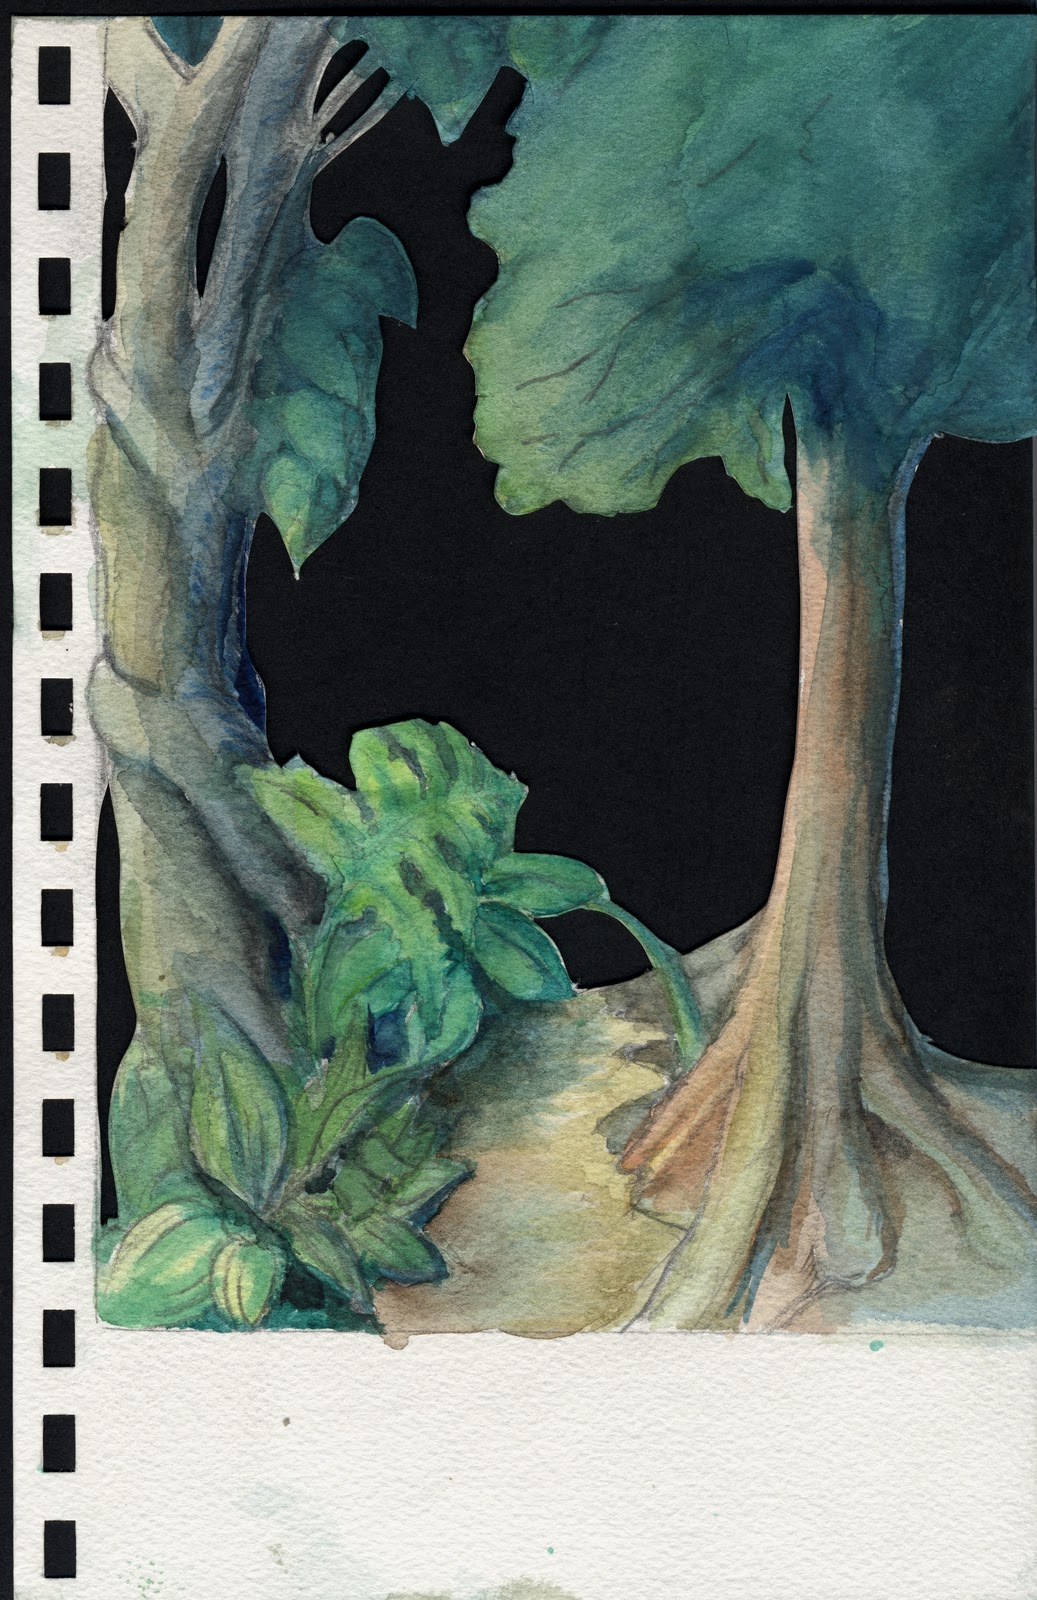
| Here is a landscape of mine, with all the layers put together. What is hidden in the forest? What is behind the trees and around the bend? |
Let's take the picture apart to reveal it's secrets.
 |
| The Horizon and Sky |
 |
| The background |
 |
| The middle ground |
 |
| The Foreground |
 |
| The extreme foreground |
Now create your own landscape on five separate sheets of paper. Then cut out the layers and see what happens when you put the picture together.
Putting together the layers will mean hiding some of your drawing. This is what makes overlapping so magical.
When you overlap it creates not only a sense of depth in a picture; it creates a sense of mystery.
If you create your landscape on thick paper, such as card stock or watercolor paper, you can create a three dimensional shadow box scene. Just glue small pieces of corrugated cardboard or foam core in between the layers of your picture to hold them slightly apart.

Landscapes 101, Depicting Pictorial Space from Rachel Wintemberg on Vimeo.
The Helpful Art Teacher explains how you can use your knowledge of extreme foreground, foreground, middle ground, background and overlapping to create cool art. With a little imagination you can choose to depict realism, create optical illusions or just make people laugh.
Click on the link below to see more optical illusions using extreme foreground: http://twistedsifter.com/2013/03/most-perfectly-timed-photos-ever/
Woodblock prints by Andō Hiroshige, Edo Period, Japan, 1797-1858
The artist, Hiroshige, was a master at creating layered landscapes with a sense of deep space, framed by extreme foregrounds:

One Hundred Famous Views of Edo: Maple Trees at Mama, Tekona Shrine and Linked Bridge, 1857

To learn more about Andō Hiroshige, click on the link below:
Create your own landscape with an extreme foreground, foreground, middle ground, background, horizon and sky, following the same basic compositional formula as the worksheet above.
Here are some helpful hints:


To learn how to create your own three-dimensional shadow box, depicting overlapping layers in a landscape, click on the link below:
Below is an album of some of my own photographs depicting landscapes with extreme foregrounds. All of the pictures are different from each other, yet they all include the same basic layers of space common to all landscapes.
Notice how, as in Hiroshige's prints, the objects in the extreme foreground frame the composition, emphasize a sense of deep space (near and far) and invite the viewer to enter the world of the picture.
I just started reading your blog and have bookmarked it. Lots of good ideas and inspiration here. The idea of using an upside down cup or piece of paper to block (mask) splatter never occured to me. Thanks. One thing I do with old paintings I don't entirely like is cut them up into pieces for collage or go back in with colored pencil.
ReplyDeleteThank you so much! :-)
ReplyDeleteThanks
ReplyDeleteYour lovely artwork first attracted me to your site; I was looking for helpful tips on water colour painting. Your site is a delightful surprise - full of creative ideas and I am retaining a bookmark for it. Thank you. :)
ReplyDeleteHi there, I'm an mature adult and want to learn to paint, but am afraid of my failures. I have just read your advice on 'Messing Up'and it is so right. I'm now fired up to be a bit more thick-skinned and do much more practice. Thank you for your helpful blog.
ReplyDeleteHi I'm a filmmaker and I was reading how to create a 3D world on a 2D frame by using Overlap as an aspect, your article has made me understand more about the concept, Thank You
ReplyDeleteHi am a Filmmaker,I was reading how you can create a 3D world on 2d frame using overlap as an aspect and stumbled upon this which has made me understand more about the concept
ReplyDelete