

Due to the Coronavirus Pandemic, I have completely updated this lesson so that students can create turnarounds using paper, pencil, Sharpie Markers, a cell phone and a Chromebook. This video explains how:

The picture above shows the figures from the turnaround digitally colored in and shaded using Photopea.

The picture above illustrates the coloring process. The color and shading are added to the layer below the outline.
The rightmost figure, on the other hand, has only flat color added without shading, for comparison.
The shading helps to give the figure more volume and contributes to a more three-dimensional look.
The figure without shading has a flatter, more graphic look. Designers should know how to add both flat color and shading to their artwork so they can decide which technique to use on any given project.
If you have access to Adobe Photoshop and Adobe Animate, please follow the instructions below. Otherwise, you can skip down to the helpful reference worksheets I have provided for you.
I created these turnaround GIFS using Adobe Photoshop. I saved the layered PSDs so I can use them as animation assets later in Adobe Animate. I also created two template worksheets for you to use as size and position guides when you create your own original unique characters.

Below is a step by step video showing you how to create your own animation turnarounds. Immediately below the video, you will find the necessary worksheets. Right click each worksheet, open it as a new window and download it to your computer. Then open it in Adobe Photoshop, adjust the opacity so that the image is barely visible, create a new layer on top and begin creating.


Once you have created your original cartoon character turnaround, you are going to need to add color. Please watch the video below to learn how this is done.
Below is an example of a character I began creating this weekend with color added

It is important to keep ever part of the body in the same position when creating a turnaround. The body rotates but absolutely nothing else moves.
You may use the drawings below, by the great cartoonist Burne Hogarth, as head position and sizing guides when developing the personality of your original characters.


The picture below 'A micro-DICTIONARY of GESTURES' was drawn by Will Eisner.

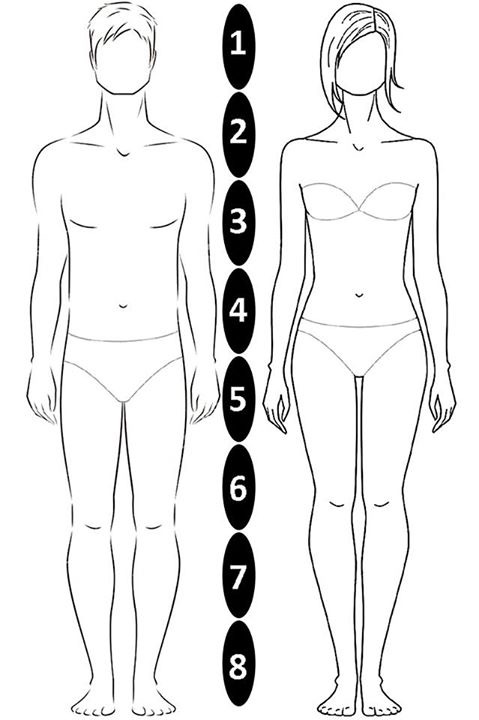
I am not sure who drew the two templates below, but they are very useful. Please contact me if you know the names of the artists so I can give proper credit:

If you are interested in a more cartoon like style, I downloaded the fun worksheets below years ago. I apologize to the artists who created them for not knowing their names. I will be happy to edit this post and give proper credit if someone lets me know who drew them.


Happy animating! I can't wait to see what you create.
Click here for my complete digital technology supply list.
Mrs. Wintemberg's
Essential Library for Aspiring Animators:
The Illusion of Life, Disney Animation
Essential Library for Aspiring Animators:
The Illusion of Life, Disney Animation
How to Draw Comics the Marvel Way By Stan Lee and Steve Buscema
Basic Animation by Walter Foster
How to Make Film Cartoons by Preston Blair
|
Hello - This is a very helpful post! I'm teaching HS art & animation virtually this year, and we are successfully using wick.com, a browser based app to do turn-arounds.
ReplyDelete