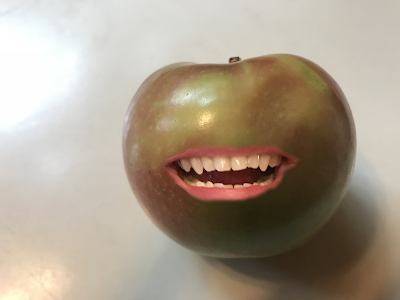
Anyone can use the lasso tool to cut out facial features, paste them on top of a picture of a piece of fruit in Photoshop and try to claim that they have fulfilled this assignment.
The real challenge is to create a convincing enough optical illusion that your audience does a double take, followed by a 'Wow! Cool! How'd they do that?' In this tutorial I will teach you how to warp facial features so that they look like they curve around the fruit and seem to truly belong there. I will teach you how to make the features look like they are actually emerging from or embedded in the fruit.
Below are two video tutorials that give step by step instructions for this assignment. I have also included screenshots with descriptions of key steps in the process.
Video 1: Adding the mouth
Video 2: Adding the eyes and nose
 |
| Use the move tool to position the mouth over the fruit. |
 |
| Click Transform, Scale to resize the mouth |
Use the burn tool to make the shadows on the mouth match the shadows on the apple.
 |
| Use the dodge tool to make the highlights on the mouth match align with the highlights on the apple. |
The instructions for adding the nose and eyes are pretty much the same as those for adding the mouth, with one exception. You want the mouth and eyes to be a different color than the fruit, but the nose should match the peel of the fruit as closely as possible.
 |
After adding the nose layer, I experimented with the different filter layers (visible over the filter window). Normally the layer filter is set to 'normal'. However, if you click on the world 'Normal' a pop up menu appears and you can experiment with different choices. The one that worked best for me is 'Overlay'. You can also mess around with the layer opacity, also located near the layer menu. Next, use the clone stamp to hide the edges of the nose, just as you did with the mouth. Gourd Face by Katherine Valdez Potato Head by Johanna Leonardo Annoying Orange by Paulino Gomez
Almendra Sandoval, Acorn Squash Face
|
Looking for camera equipment? Amazon has some seriously good deals and making purchases through this link will help support this page:


Sometimes when I do this, the pictures taken have an overly warm coloring. The students can fix it in editing software, but I was wondering with the array of light bulbs out there, if you found one that was true to the color of the objects?
ReplyDeleteThe bulb is lights of america 2814s-GU24
DeleteIt’s specific to the lamp. Not your ordinary screw in bulb. The lamplight is very white