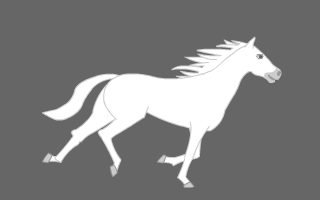
Rotoscoped cartoon of a running horse traced from a series of photographs
by EADWEARD MUYBRIDGE.
Muybridge published his groundbreaking book ANIMAL LOCOMOTION in 1877.
 |
| Animal Locomotion Plate 628 by Eadweard Muybridge |
*Rotoscoping is an animation technique in which animators trace over footage, frame by frame, for use in live-action and animated films. Originally, recorded live-action film images were projected onto a frosted glass panel and re-drawn by an animator. This projection equipment is called a rotoscope.
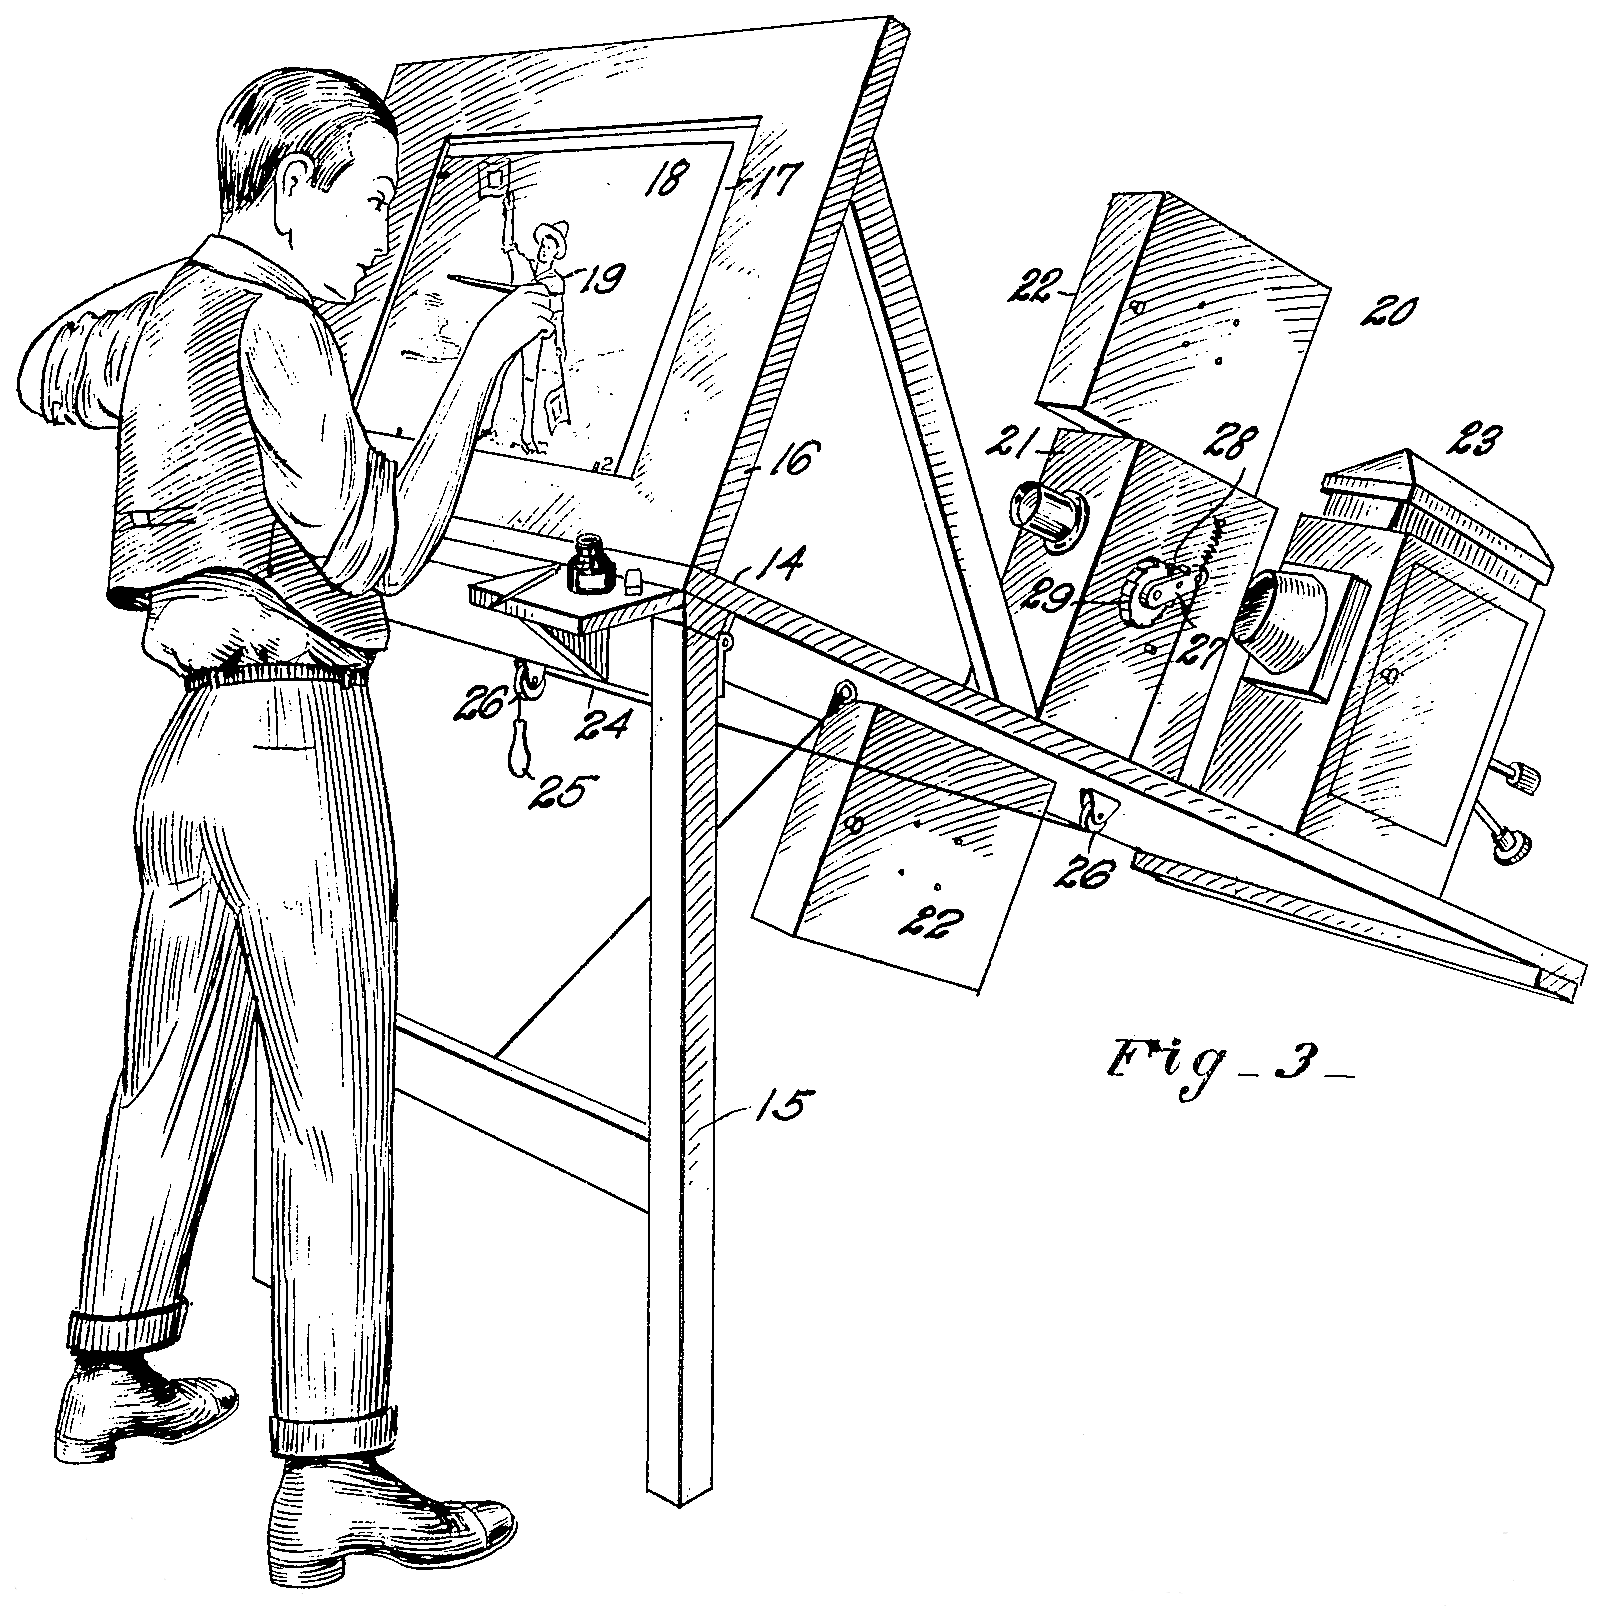 |
| Patent drawing for the original rotoscope. The artist is drawing on a transparent easel, onto which the movie projector at the right is throwing an image of a single film frame. *Courtesy Wikipedia |
Now that you understand the basic rotoscoping process, you can appreciate just how valuable a resource Muybridge's ground breaking photographs are to animators. It was the first time an image motion sequence had ever been created. To this day, animators use his collection to create frames by drawing on top of them in another layer.
However, in this day and age, you no longer have to use trip wires. You can use your cell phone to take a burst of images or even a video on you phone and export it as an image sequence using Final Cut Pro or other professional movie editing software.
If you have access to professional video editing software, like Final Cut Pro, and professional design software, like Photoshop, modern rotoscoping will be much easier for you than it was for early animators.
You can take any video, from your phone or a DSLR camera and export it as a sequence of images (frames) and then stack those images in order. Final Cut will even put them in a numbered sequence for you.
The latest version of Adobe Photoshop will enable you to import the images in a stack and test the movement sequence on the timeline before you save the file. You can then either save the movement sequence as an animated GIF or import it as key frames into Adobe Animate. The creative possibilities are endless. Please see my video below for detailed instructions.

I created the animated GIF above from a four second video on my phone of my husband opening and closing his hand.
If you do not have access to professional software, there is still a lot of rotoscoping you can do, using just a smart phone.
I created the content below in 2012 using only an iPad 2. At the time I was teaching middle school and experimenting with new technology for the first time. I did not have access to any professional equipment and was teaching myself as I went along.
Go through the collections posted above and save the photographs of the animals you are most interested in animating to the photo library of your IPad, IPhone or IPod touch. You can use them to practice rotoscoping using the app 'Animation Creator'. Print them out and use them as a reference as you learn to create dynamic animations of birds and animals.
GETTING STARTED
Here is how to use and IPad, IPhone or IPod Touch and the app 'Animation Creator' to try rotoscoping:
Once you have tried rotoscoping, you will want to start synchronizing the mouths of your animated characters with their words. I created this video to show you how (please note, in 2012 when I created this blog post there were no iPad or iPhone apps that synchronized mouth movements with voice. I was experimenting on my own):
Advanced rotoscoping: How to sync mouth movement with speech
from Rachel Wintemberg on Vimeo.
Use the pictures below as a quick reference when you animate. Draw in your own mouths frame by frame to correspond to the sounds your character is making. Remember to spell phonetically and leave out silent letters. Adjust the speed of your animation while mouthing the voiceover before you send your video to your photo library. Finally, do your voiceover in IMovie. IMovie enables you to dub your sound as the video is playing so you can sync your lip movements to the cartoon. Go to http://photobucket.com/LipSyncForAnimators to download my entire library of sound synchronized mouths. Save them to your IPad or Iphone and drop them into your animations for lifelike speech!

Printable worksheet, Lip Sync alphabet for animators page 1
 |
| Printable Lip syncing worksheet page 2 |
I used the mouths in the worksheets above to create these simple videos.
I synchronized the sound using IMovie.
Lip Sync Experiment #3 from Rachel Wintemberg on Vimeo.
Here is my complete Lip Synchronized sound alphabet. Feel free to download it and experiment with sound in your own animations.


No comments:
Post a Comment