BLOCKING IN SHADOWS
chiaroscuro is an Italian word, literally meaning "light dark". It is used to describe the skillful balance of light and dark in a painting, with strong contrasts to create dramatic effect.

Mid-afternoon lighting, high up on the Beartooth Plateau in Montana: Light source is off the right hand edge of the paper, parallel to the trees,
creating dramatic shadows.

Step 1) Gather your source materials. You can use your own photographs or images gathered from the Internet. Here is my photo album of Mysterious Tree Images. You may print out photos from this collection to inspire your paintings.


If you don't have photographs of your own that you would like to paint, try using Google advanced image search and typing key words like 'landscape', 'trees' or 'mountains'.
Here are the two vacation photos that I used for this exercise:

2) Now it is time to draw your landscape. Remember to work in layers and to include an extreme foreground, foreground, middle ground and background.
Since I am creating a watercolor painting, I drew my picture on cold press watercolor paper. You do not need expensive watercolor paper for this lesson.
Here is my drawing:

3) Next, choose a light source that is off the edge of the paper coming from above and to the right. It will make it easier for you to follow the lesson if our light sources are the same.
Please do not draw the sun in your picture. If you have already drawn the sun, erase it or get a new piece of paper and start over. This is very important.
Why is it so important?
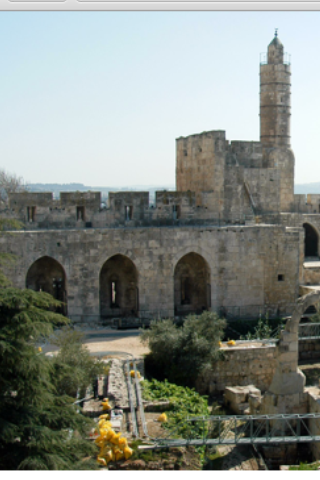
A landscape where the sun is visible has a 'backlight'. Therefore everything in the picture will be a silhouette. Take a look at this picture and you will see what I mean:
 |
| Even though it is a very pretty picture it is a BAD picture for this project because the light source is visible in the picture and the objects are in silhouette. If you want to paint a picture like this, please save it for another project. |
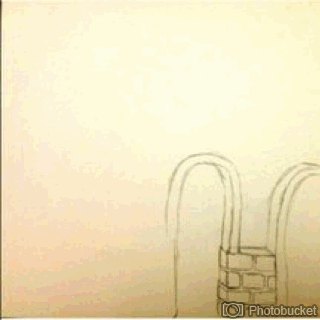
Now it's time to block in your shadows. Beginners usually find it easier to start with a pencil. Simply outline the left hand side and the bottom of each object in the picture with a 6B pencil.
If you accidentally trace the right side of any object you will need to erase it, so be careful.
4) Now it is time to paint your shadows.
Here are the names of some brushes that I regularly use when painting with watercolors:
 |
| From left to right: Mop brush, detail brush, Large square shader, tooth brush, small square shader, angled shader and fan brush. |

To block in shadows, I used the detail brush and the shader brushes. I mixed some instant coffee with water to create a sepia tone wash and began to paint, starting at the shadow side of the picture. I painted thin lines of coffee with the detail brush and then painted water next to the lines with the shader brush to soften the edge of the shadow.

I photographed the painting every few minutes to document the process step by step:
The artist Caravaggio was famous for his use of dramatic lighting, or Chiaroscuro.
Here are some oil paintings by Caravaggio
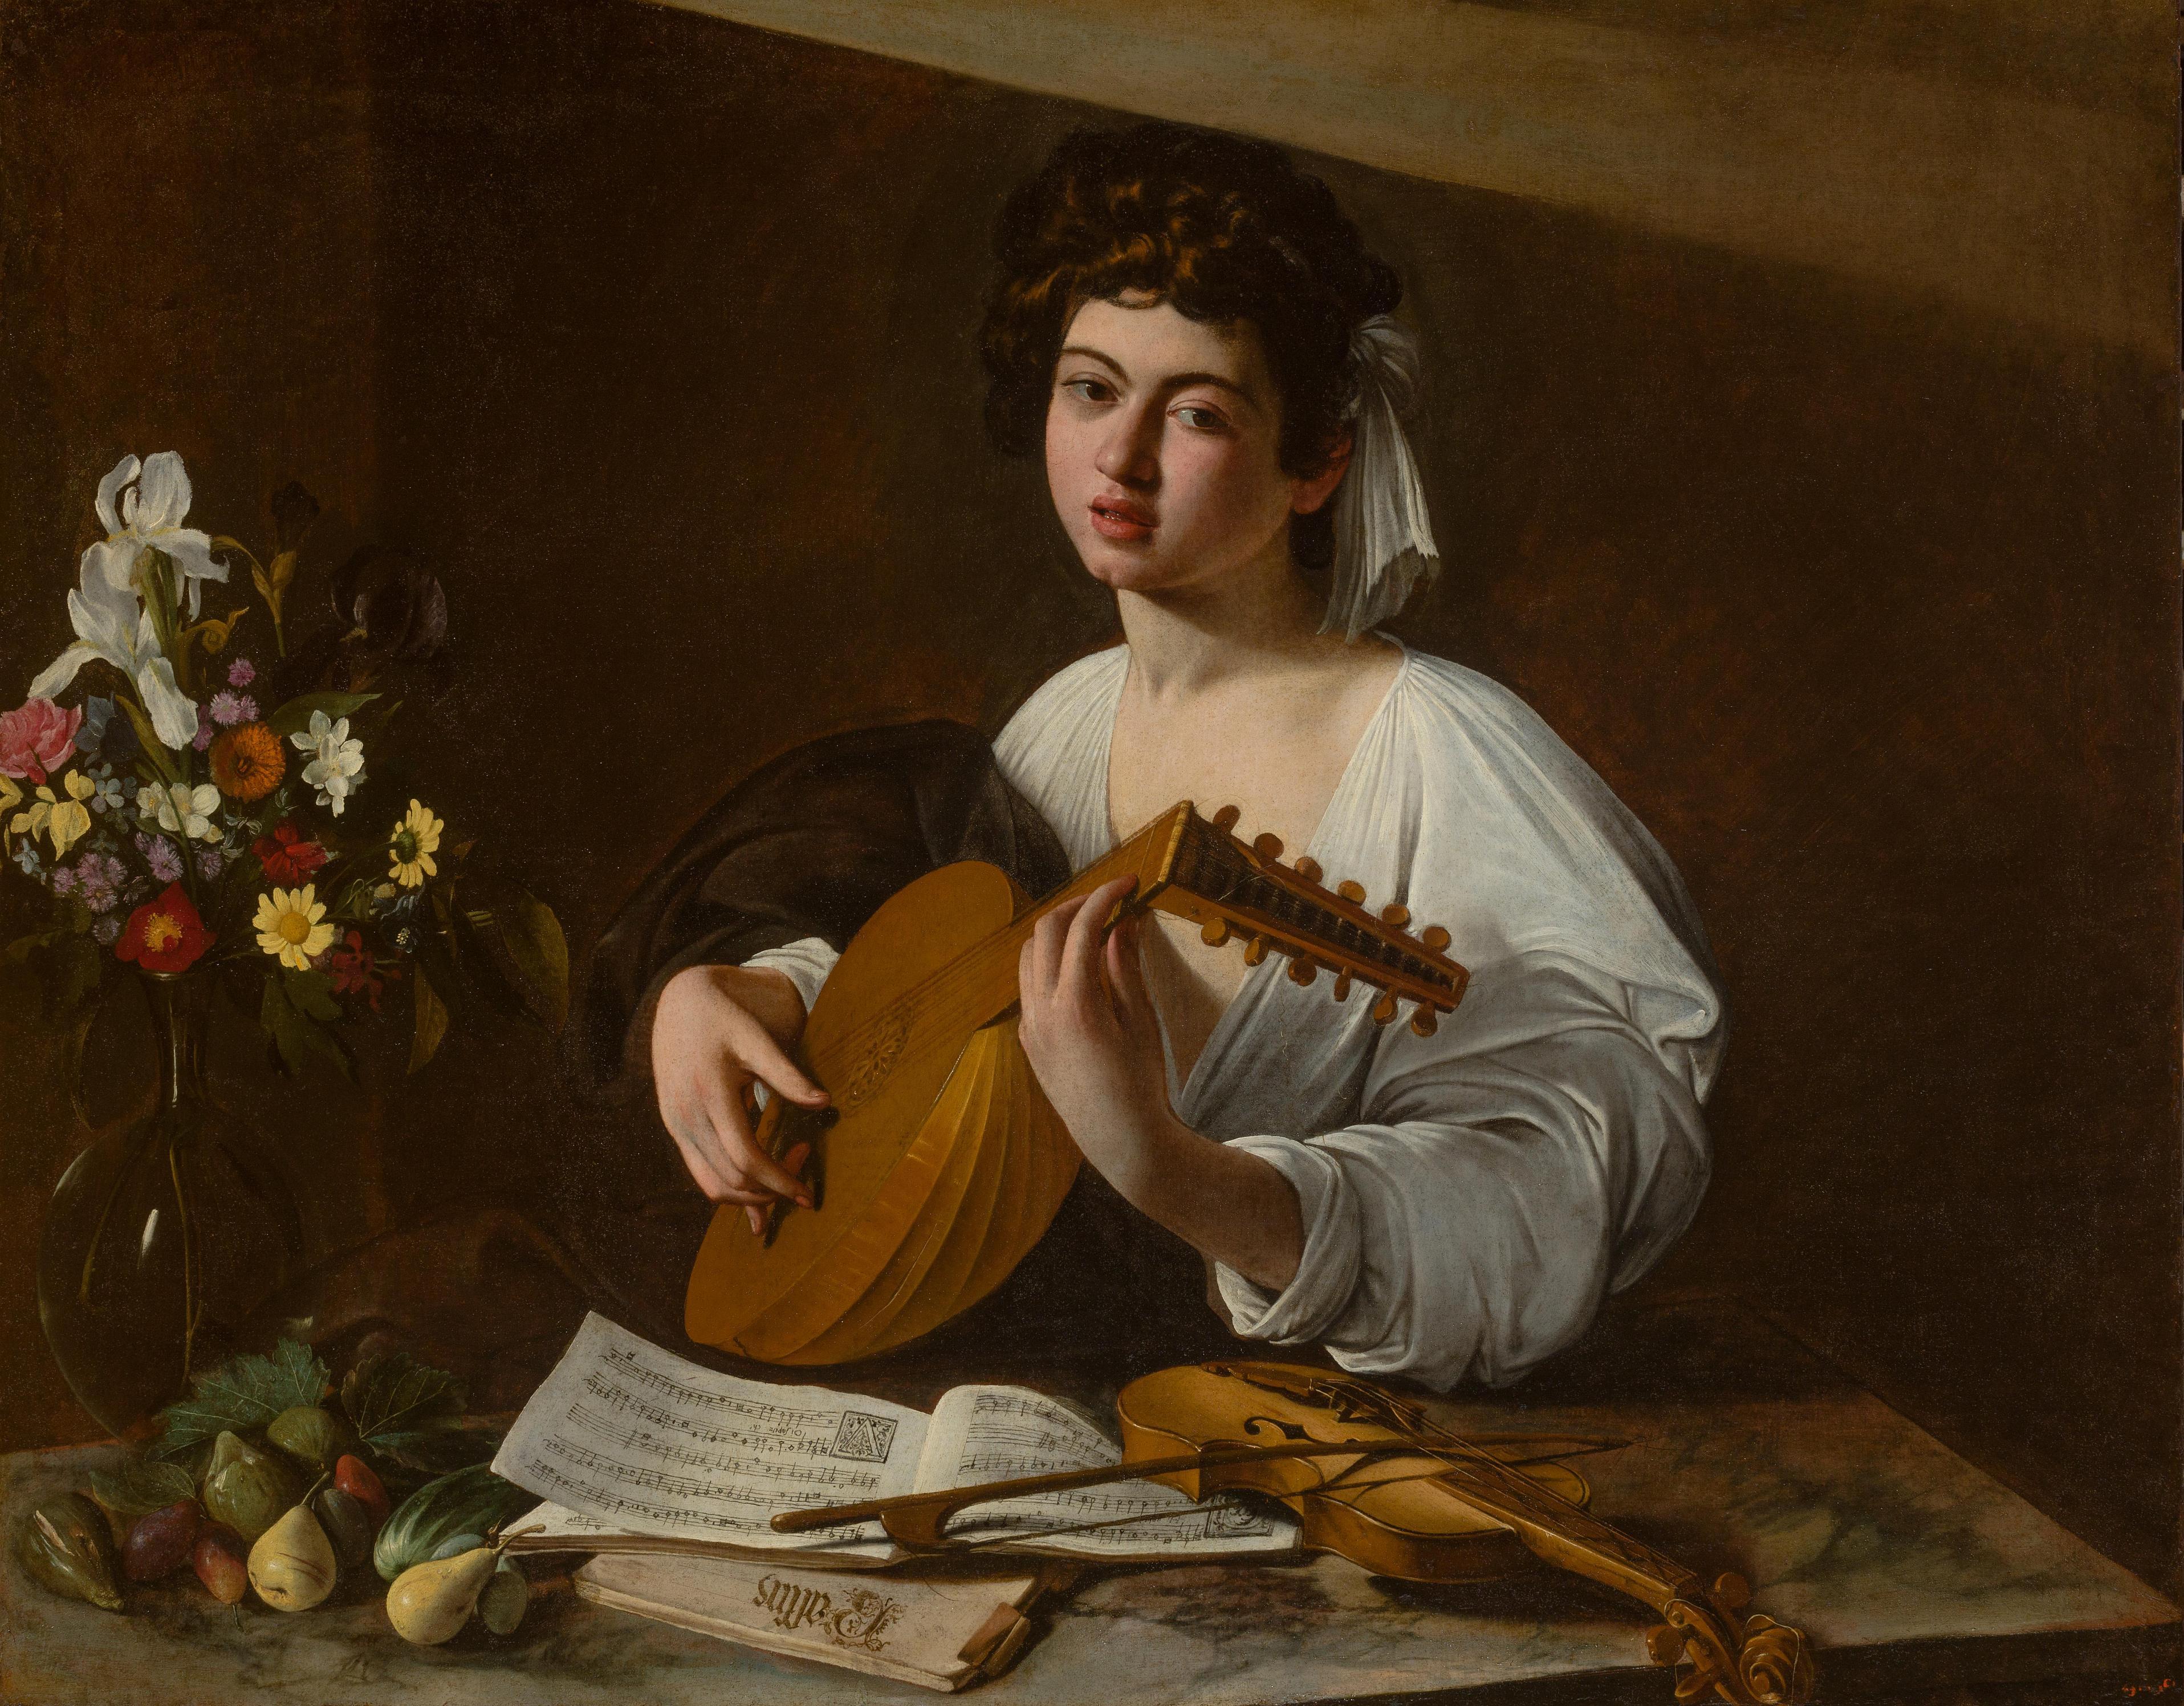
Lute Player
Metropolitan Museum of Art

John the Baptist
Cathedral Museum Toledo Spain
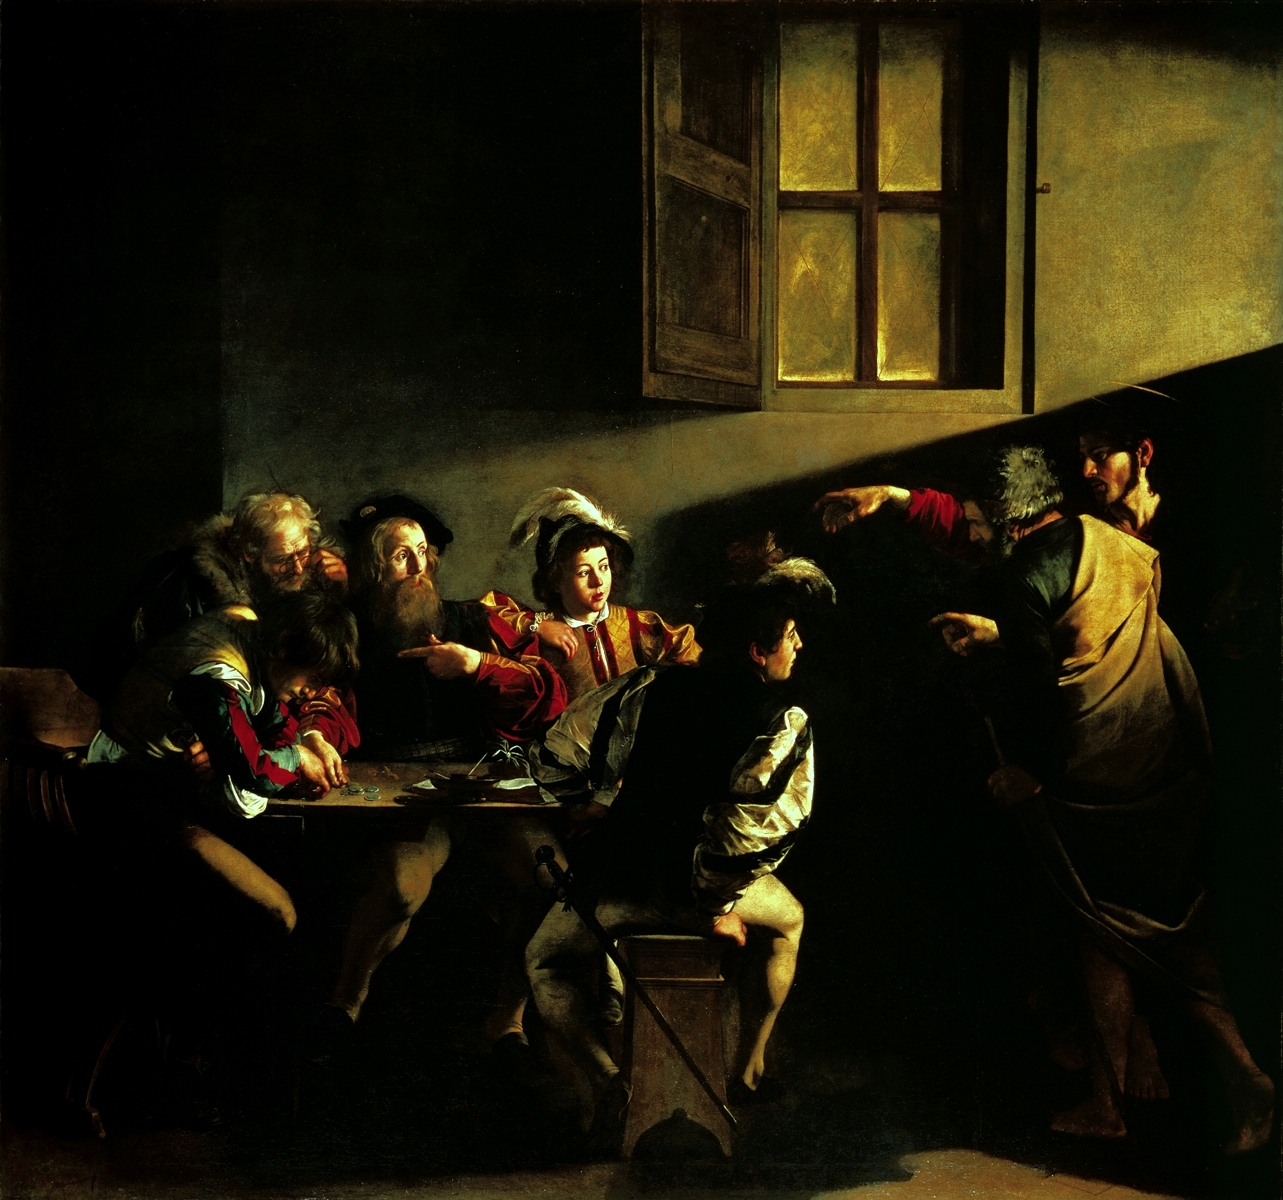
Calling of St. Matthew
Contarelli Chapel
PRINTABLE ART HISTORY WORKSHEETS FROM THE HELPFUL ART TEACHER

Medusa

IMPORTANT LESSONS ON DRAMATIC LIGHTING (CHIAROSCURO) FROM CARAVAGGIO
1)Caravaggio used a single light source in each picture.
2)The light in each of these pictures is coming from off the edge of the picture frame.
3)Caravaggio never includes the sun in these pictures.
4)The light is always coming from the side and slightly above the subjects. Caravaggio did this on purpose. Why?
Lighting a subject from the side and slightly above maximizes the drama of the picture and emphasizes three dimensional form.
Your under painting is now finished. In the next lesson we will be adding color, using transparent glazes of watercolor. We will be using some Renaissance techniques to make the colors of our landscapes look more realistic.
Please set this painting aside until you have time to do the next lesson. If your painting is dry and you are ready for the next lesson click here.
SNEAK PEEK:
Here is the almost finished painting:

The shadows I created with coffee are clearly visible through the watercolors because I diluted the paint with water to create transparent clear glazes.

Subtle dry brushing is added to give texture to the ferns in the extreme foreground
Below is a slide show chronicling the entire process:
The slide show uses a flash player.
If you have a mobile device that does not have flash, please click on this link:
To learn the exact process I used to finish this painting, step by step, click here.
What a lovely site! I have so much to learn regarding art and this looks like the most informative. Many thanks.
ReplyDeleteLynn Kelly
Thank you very much. Look for some new posts starting in the fall. I have a few lessons in mind to upload but we have no power now due to Hurricane Irene. I am posting from my phone for now.
ReplyDelete